
piros365's blog
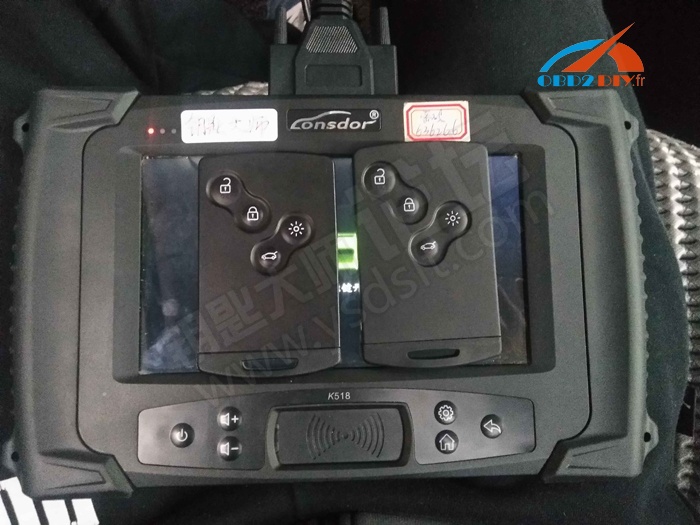
Lonsdor K518ISE program match the smart card
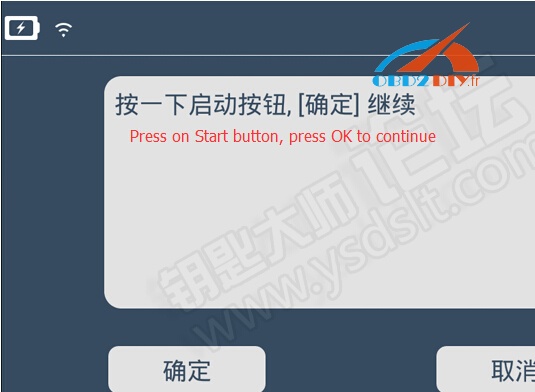
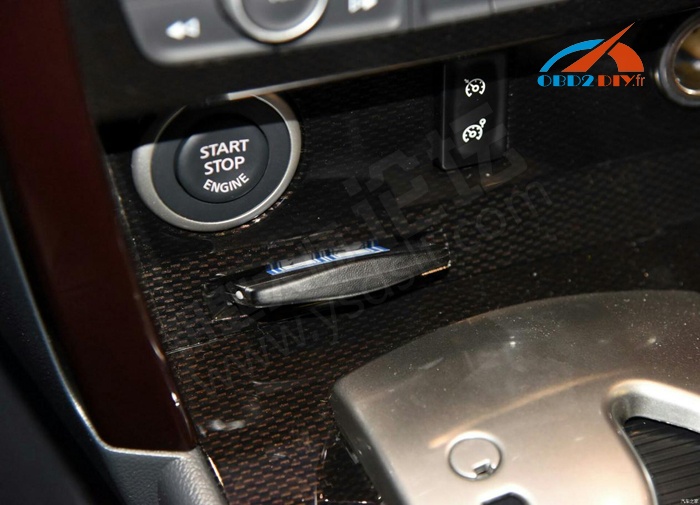
1 press the start button, open the driver door;
2 the system tries to get the password
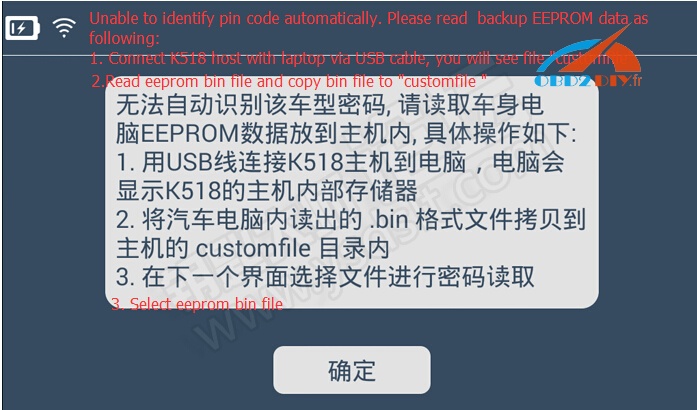
if the model can be read out, please select the password. If the vehicle password cannot be recognized, please read EEPROMdata and put it into Lonsdor K518ISE. Then do as follows:
① with the USB cable to connect Lonsdor K518ISE programmer to the computer, the computer will display K518 host internal storage;
② copy the .bin (lowercase) file of CPU data to the Lonsdor K518ISEhost’s customfile directory;
③ return to the smart card match operation, select the import file for secret read.
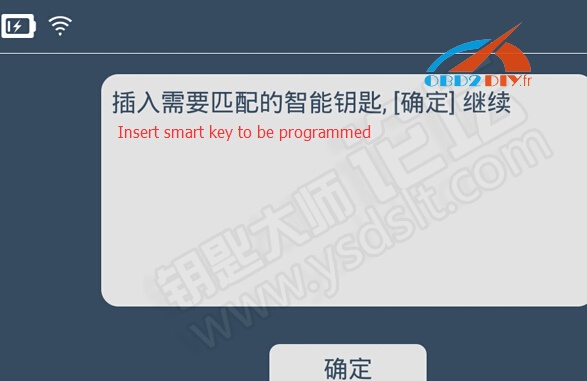
3 insert the smart key need to match . the first key match is completed; please follow the pop-up to continue to match another keys;
4 remove the smart key if you do not continue to match keys
Renault key programming is complete.
In detail… look here:
Lonsdor K518 Program Renault Koleos 2011 Smart Key
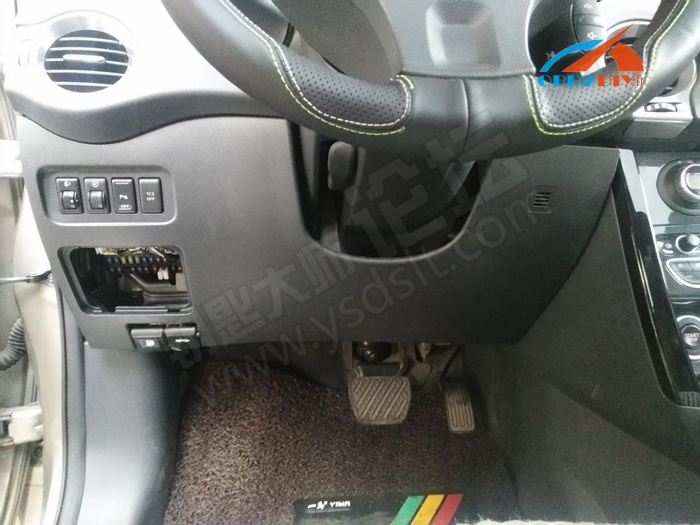
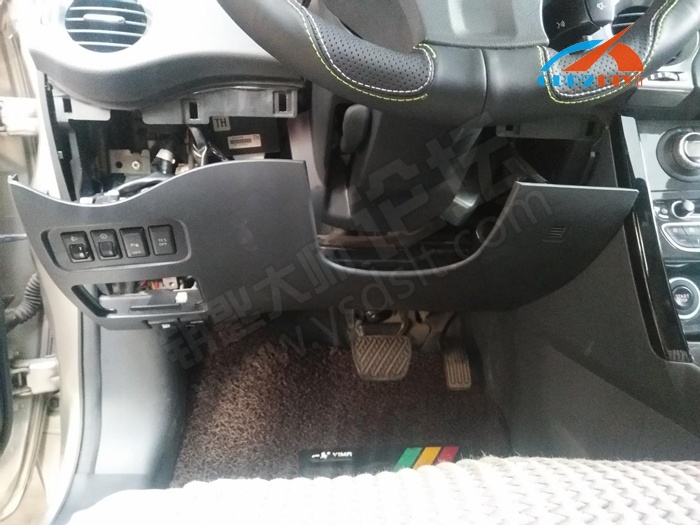
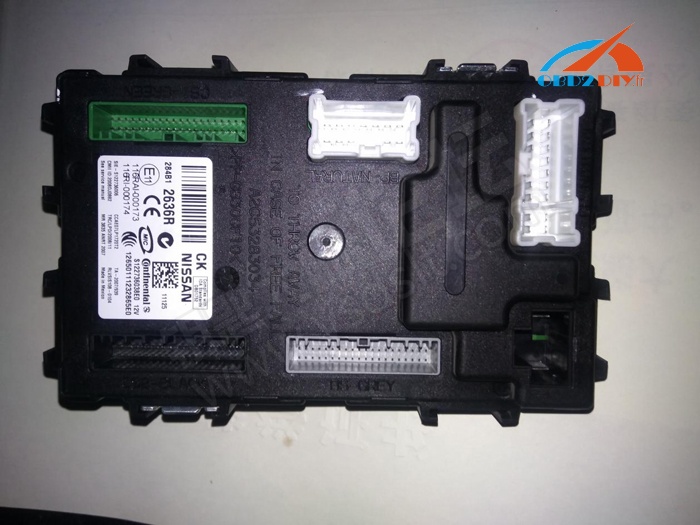
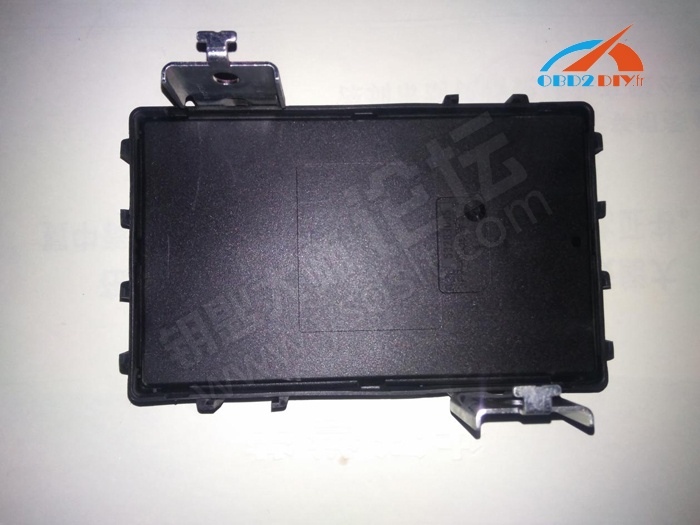
Step 1: Remove BCM
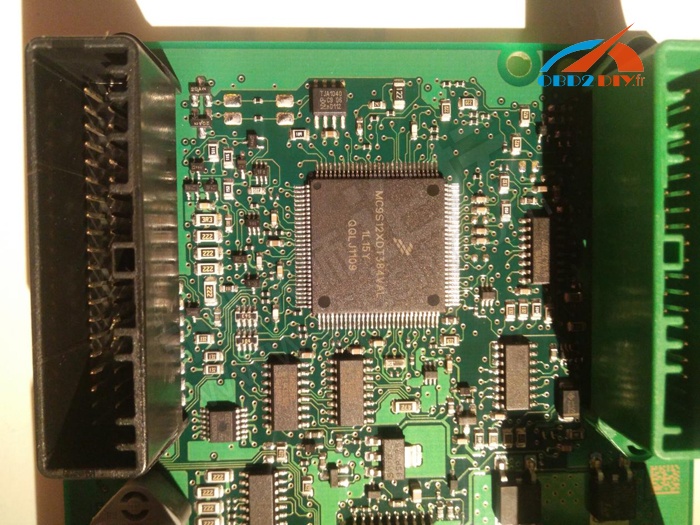
Disassemble BCM immo box and find CPU chip XDT384

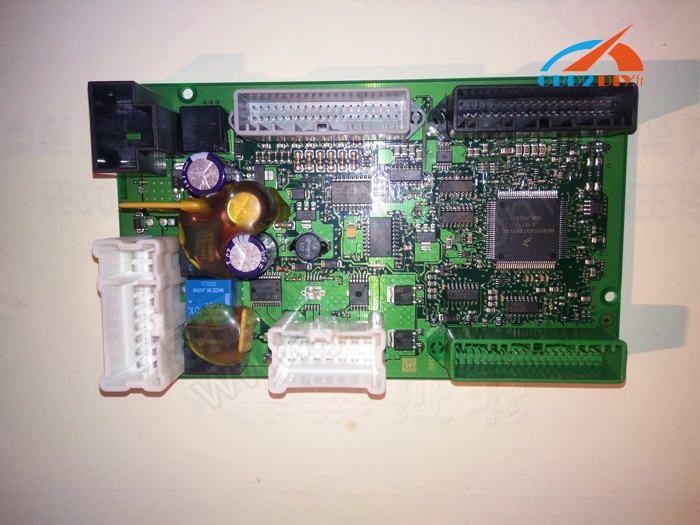
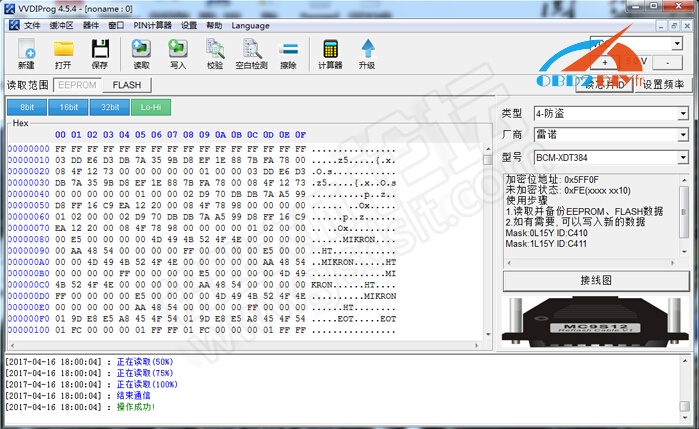
Step 2:VVDI Prog read EEPROM data
Open VVDI-Prog software
Select Renault-BCM-XDT384

Follow vvdi programmer wiring diagram to connect

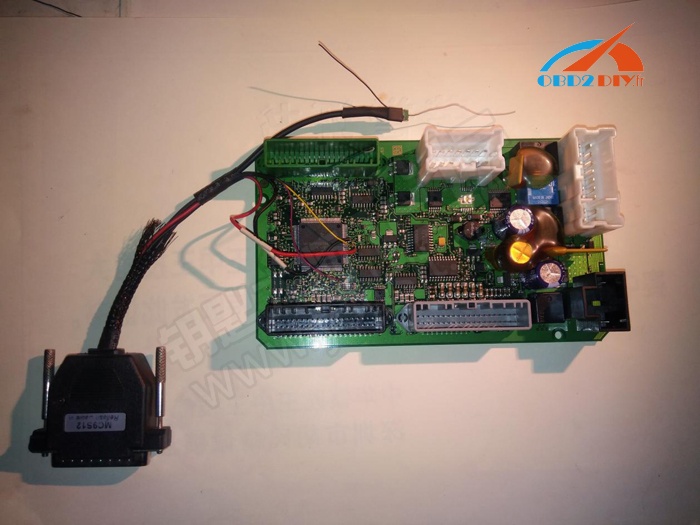
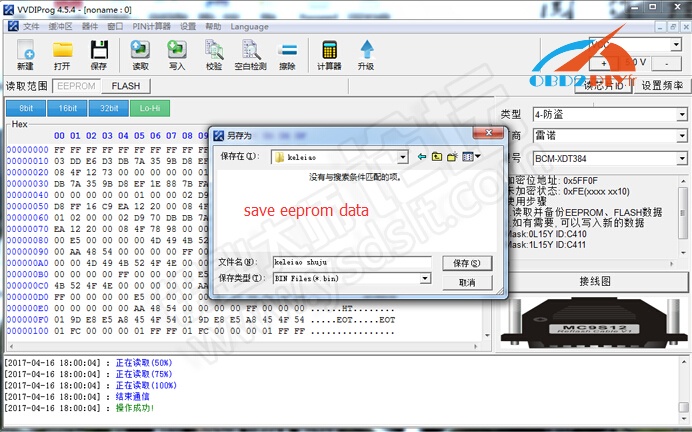
Read eeprom data and save data to bin format
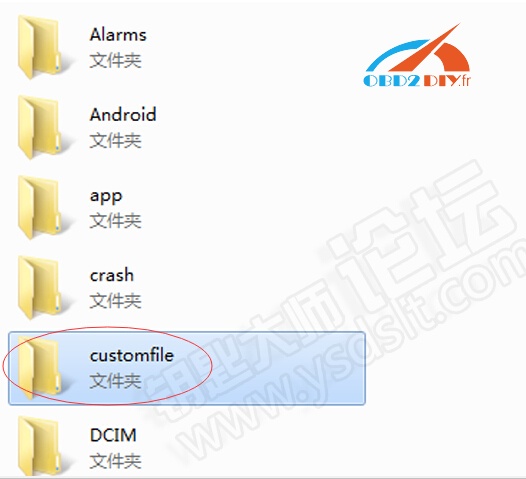
Connect K518 host with laptop via USB cable
You will see “customfile” folder on K518 software
Copy the eeprom bin file to “customfile” folder
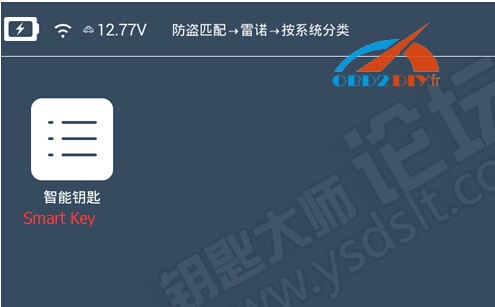
Step 3: Lonsdor K518 program Smart Key
Re-install BCM from car
Connect Lonsdor K518 key programmer with vehicle via diagnostic socket
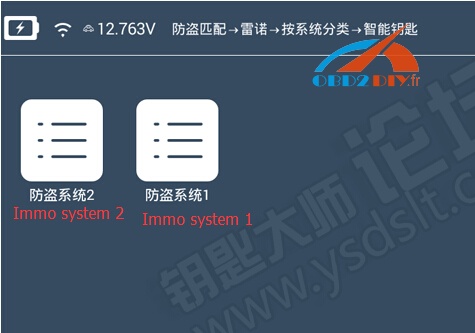
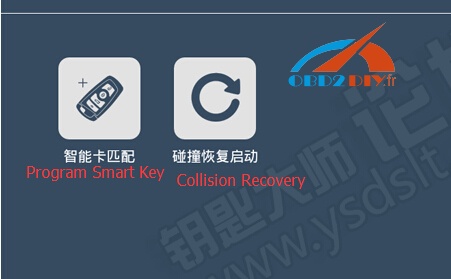
Select Renault->By System->Smart Key->Immobilizer system 2->Program smart key


Press on the Start button, press YES to continue
Open the door on driver side

Lonsdor K518ISE Auto Key Programmer shows unable to identify pin code automatically.
Follow guides below: (We have done 1 and 2)
1.Connect K518 host with laptop via USB cable. You’ll see “customfile” folder
- Copy eeprom bin file to “customfile” folder
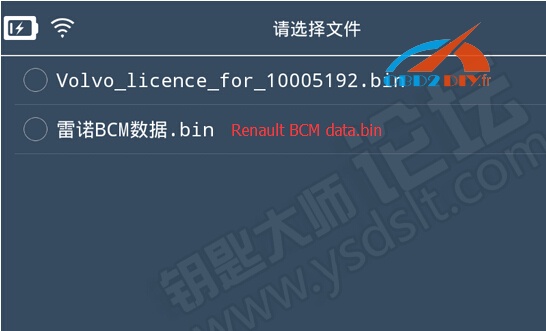
- select eeprom bin file on “customfile” folder
Select Renault BCM data.bin
Insert a new smart key to be programmed into the card slot
Configuring system
Program success. Press YES to program next key
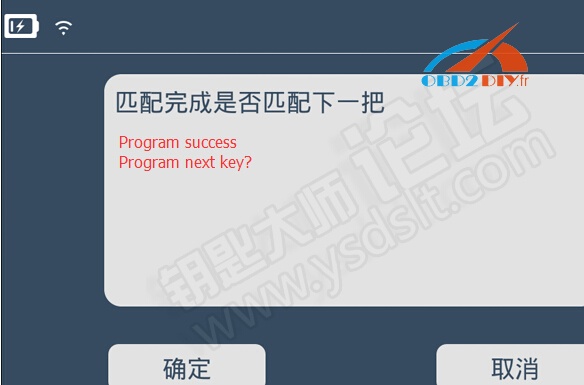
Insert next smart key into card slot
Program success.
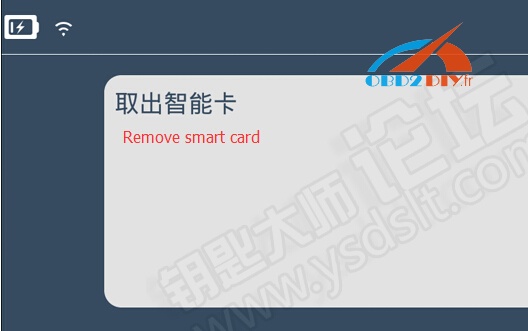
Remove smart key
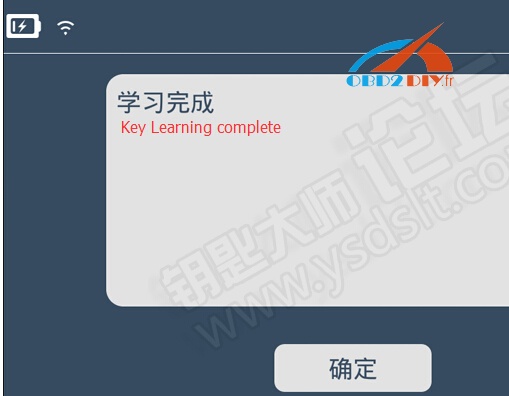
Key learning success
MB SD Connect Compact 4 wifi verson,supports reading out and erasing trouble code,reading the real-time data of sensor and actuator, coding and programming

MB SD Connect Compact 4 Star FAQ
MB STAR C4 Customer share:
Q: How to set MB SD C4 WIFI?
A: Firstly, disconnect the local areal connection, then connect the sdconnect 4 with the car and start the car, finally connect to the wireless connections, please follow the next instructions to set: click Configuration-MUX-Register/configure, under the "General information", select name "04" and then tick off "Wlan parameters, road", then set the following parameters: IP address: 192.168.2.200, Network screen: 255.255.255.0, Encryption: WEP/Hex, Key: aaaaaaaaaaaaaaaaaaaaaaaaaa (26 a in total), we have video tutorial, please click column "Video" to watch or contact our customer service to send you.
Q: Why MB STAR C4 is unable to connect with the computer; even after I try LAN cable.
A: It needs to set the IP address. How to set the IP address?
Start-Connect to all connections-Local Area Connection-right click "Properties"-Internet Protocol-Use the following IP address, IP address: 172.29.127.114, Subnet mask: 255.255.0.0, finally click "Ok", we have video tutorial, please click column "Video" to watch or contact our customer service to send you.
Q: When I start DAS, it says that, I am using the developer version. In some menus however the software does not seem to be a developer version.Is it or is it not a developer version? am NOT connected to the internet when diagnosing a car. Only the SD-Box is connected to the notebook via WLAN. Could that be the problem?
A: Have you set the "sdc4" well? Could you please do a self-checking for your device? Then show me the result of the self-checking. Please refer to the following steps of self-checking.
A: Did you have the SD C4 set well? Please follow the next instructions to have a self-test, and then send us the self diagnostic report.
Q: MB SD STAR C4 is unable to self-test?
A: check whether the COM PORT is COM2, if it is, there are four possible reasons: 1) the COM PORT has problem; 2) MB SD C4 and the computer has a poor connection. 3) The cable or SDC4 doesn’t work; 4) SD C4 disconnect with the car.
Q: When I do self-diagnosis for MB, I got error message: 3001 Error.
A: Self-diagnostic has error not suggest MB SD C4 has problem. The aim of self-diagnosis is to check whether STAR C4 connect well with the computer and the car, whether the IP address and parameter is set correctly, whether the SD connect c4 and the driver has successful communication. We have video tutorial on how to do self diagnosis for SD C4, please follow it to operate, if you are able to self-diagnostic, it suggests MB SD C4 settings is OK, the connections is OK and it has communication between MB SD c4 and the software. Just go to test the car, if you got any errors, screenshot them and send us to judge where the problem is.
Q: Does MB SD C4 support SCN coding?
A: Our SD C4 hardware support offline programming, but the software needs to active, and it will cost additional money.
Q:MB SD C4 could read chassis number for Smart 1998, but unable to test ECU after connected with the car.
A: It needs login password when test Smart, we have DAS SMART Calculator (Item No. ss27) to help calculate login password.
Q: Which tool can diagnose ML 270 2005 and A class W169 2007?
A: MB SD C4.
Q: Which tool can diagnose Mercedes Benz Trucks, 3335, 1823 and 1413?
A: MB SD C4.
Q: Which tool can diagnose and program for Mercedes Benz BUS body.
A: MB SD STAR C4 .
Q: Where to find Smart TAN CODE in the software of MB SD C4 ?
A: Sorry, so far we have no Smart TAN code, advice you go to 4S store or original factory to consult.
Post is on which tool best to change KM in BMW FEM BDC system? and how to do?
Tools Option:
Xhorse VVDI2 (Pay extra money for BMW FEM/BDC authorization)
Yanhua FEM/BDC Programmer V1.4
BMW Explore
Guide:
- How to use Xhorse VVDI2 to change KM in BMW FEM BDC?
Xhorse VVDI2 V4.3.0 supports reset FEM/BDC KM(cluster require reset manually).
VVDI2 V4.3.0 download free:
https://mega.nz/#!W1pSRRTL!0n8OX4wshaB1s0O06SDhTR0KvO32nPHZWg4CQjBMdrA
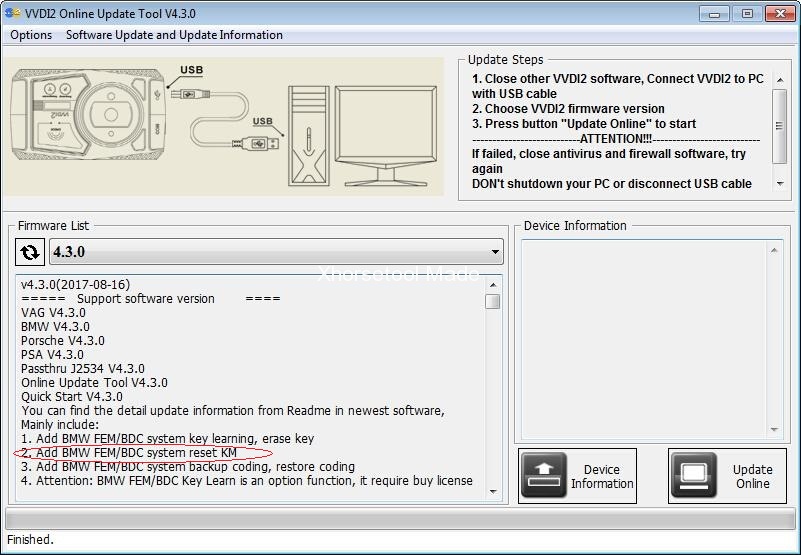
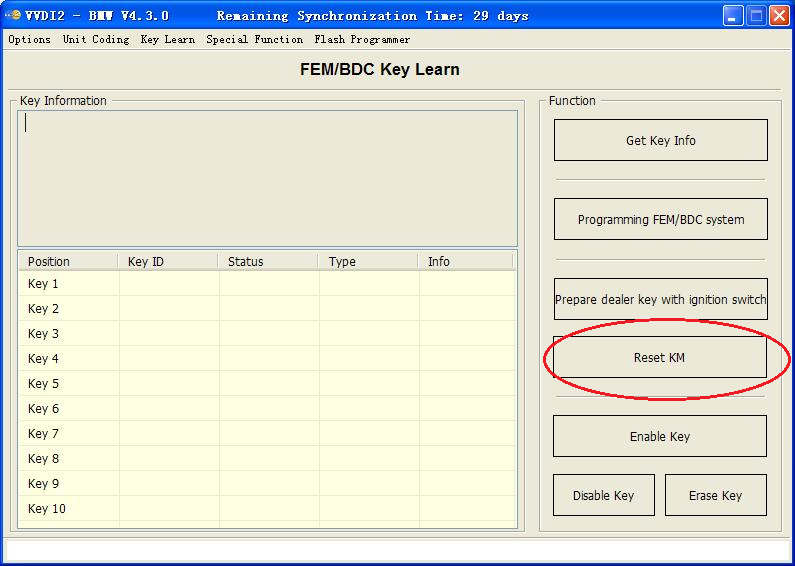
How to Reset KM in FEM/BDC system?
Just follow the steps on the screen if you have no idea.
Price: Extra 600-800dollars to authorize FEM/BDC.
- Guide: BMW FEM BDC KM reset with Yanhua FEM/BDC Programmer V1.4
Since Yanhua FEM/BDC Programmer V1.4 update, KM reset is working.
Yanhua FEM/BDC Auto Key Programmer source:
http://www.fobdii.com/wholesale-509-yanhua-bmw-fem-key-programmer.html
& software V1.4 with FEM BDC KM reset download:
http://www.autoecu.com.cn/download/page.do
OS: XP/Win7/Win10
Files contained:

Using tips:
The software and hardware must update all!!!
The step as follow:
- install BMW_FEM_BDC_EN_V1.0.4.msi
- run BMW_FEM_BDC.exe
- click “Upgrade adapter”, select the upgrade file: BMW-FEM-V14.bin
- follow the tip, wait for upgrade complete
I made a definitive guide of how to set up DHCP server on an external router for BMW ECU flashing with BMW ICOM diagnostic tool.
Why is this necessary?
When flashing specific modules (KOMBI, NBT,..) on F and G series, the
ICOM switches between different IP addresses and therefore loses sync with the computer. In order to resolve this issue, there needs to be a DHCP server between the ICOM and PC, which redirects any traffic on the selected MAC address (in this case the ICOM’s MAC address) to a specified IP address.
All three connected devices (PC, ROUTER and ICOM incl. icom a1, icom a2, icom next) need to be set to DHCP.
In this tutorial, I used an old D-Link DIR-300 router. You can use any router that supports setting its’ netmask to 255.255.0.0 and has the capability for DHCP server.
Step-by-step instructions:
Before this, you need to turn off your Windows Firewall !
Step 1: Configure your PC to DHCP
Go to Control Panel > Network Connections > Ethernet>Properties
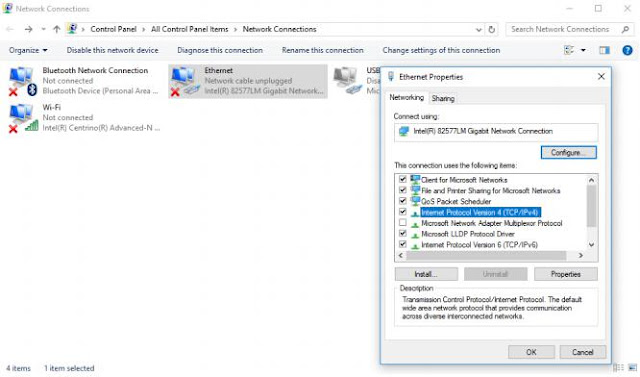
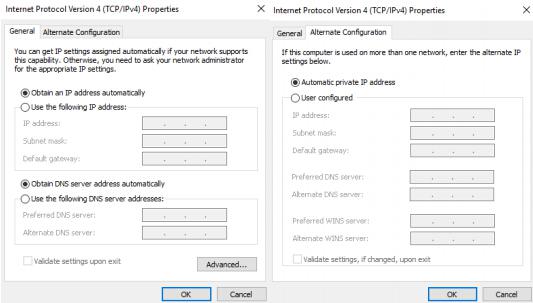
Select: Internet Protocol Version 4 (TCP/IPv4) and click Properties.
Both tabs need to be as follows:
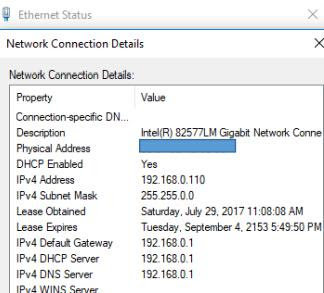
When you now connect something with LAN cable, your Ethernet card under Control Panel > Network Connections > Ethernet>Details should now show DHCP Enabled Yes.
Step 2: Configure your BMW ICOM Software to DHCP
Connect your ICOM to the car’s OBD2 port, wait for it to power on and connect it to your PC via LAN cable. Wait a minute or two to be recognized by the PC.
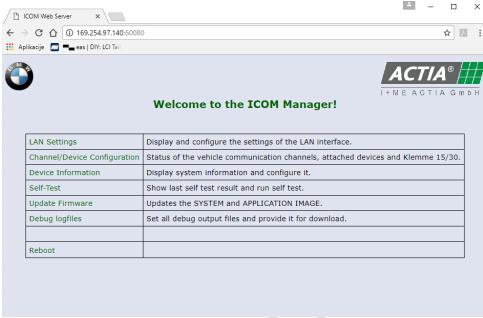
In iToolRadar or Dr. Gini take a look at your ICOM’s assigned IP address. Copy it into your web browser (I use Google Chrome) and at the end add :60080 (this is the port fort the settings).
Example: http://169.254.97.140:60080/
You will then be asked for a Login username and password.
Username: root Password: NZY11502
Under LAN settings make sure your ICOM is set to DHCP. Make a note of the ICOM’s subnet mask.
Step 3: Configure your router for DHCP server.
Disconnect ICOM, power up your router and connect it to your PC via LAN cable. Use the router’s LAN ports.
Open Command Prompt (CMD) and type in ipconfig.
You will see a list of your Connection Cards configurations. Under LAN you will see your router’s IP addresses. Copy the Default gateway IP address into your internet browser. This time you do not add any port number at the end. P.S.: If there is no Default gateway listed, make a hard reset of your router with its’ physical reset button.
Type in the username and password of your router. The default username is usually admin and the password is either nothing/blank or also admin.
Now go under advanced and turn off your router’s firewall. In my case it is under ADVANCED>Firewall&DMZ. Disable SPI, save settings.
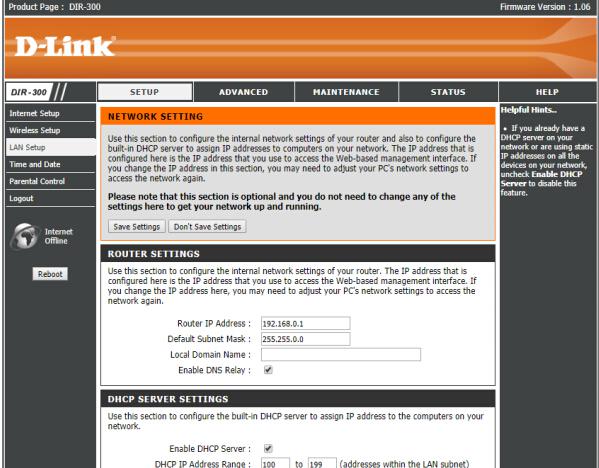
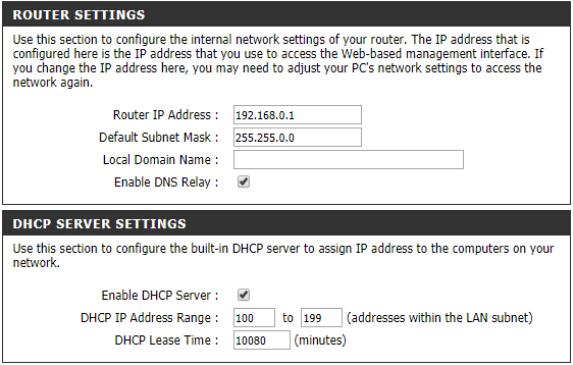
Then go to LAN settings and assign 192.168.0.1 with subnet mask
255.255.0.0 to your router.
Important: The subnet mask of the router needs to match ICOM’s subnet mask. Enable DHCP server.
Set the pool to be between 100 and 199.
Save settings and reboot your router.
The DHCP Client list should now be populated with your PC’s address. If not, physically power off and on your router (maybe also PC), then check again.
Settings should look like this:
And your PC listed under DHCP client List.
Step 4: Connect everything together
Power off your router, disconnect it from your PC, disconnect your ICOM from the car and LAN. No device should be connected via LAN to anything at this point and both router as well as ICOM should be powered off.
Follow this exact order:
Power on your router. Wait 2 min for it to fully boot up.
Connect ICOM to the car’s OBD2 port and wait for it to fully boot up. Connect ICOM to the router via LAN cable. Use the LAN ports on the router (port number does not matter). Wait a minute or two.
Connect your PC to the router via LAN cable. Use the LAN ports on the router (port number does not matter). Wait for the PC to recognize the router.
In web browser connect to your router’s settings menu as described in step 3. Take a look at the DHCP Client list under LAN settings. Your ICOM and PC should be listed.
Open iToolRadar or Dr. Gini and you should see your ICOM listed with an IP address of 192.168.0.x, where x is a number between 100 and 199.
This is it. You can now open ISTA/D and run a vehicle test with your BMW ICOM A3 Pro+. If ISTA/D recognizes your vehicle fully, you are all set. If not, there is a problem and you should not attempt to flash anything.
Good reference may help you out:
How to setup router for Programming KOMBI and NBT
Router DHCP, Icom DHCP and Windows Ethernet: automatic dhcp
First of all the ICOM should be configured this way:
ICOM Config
ConnectionMode = STATIC_IP
Ip = 192.168.68.85
Netmask = 255.255.255.0
Gateway = 192.168.68.99
DHCPSRV.INI
[SETTINGS]
IPPOOL_1=192.168.68.1-254
IPBIND_1=192.168.68.99
AssociateBindsToPools=1
Trace=1
DeleteOnRelease=0
ExpiredLeaseTimeout=3600
[GENERAL]
LEASETIME=86400
NODETYPE=8
SUBNETMASK=255.255.255.0
NEXTSERVER=192.168.68.99
ROUTER_0=192.168.68.1
[DNS-SETTINGS]
EnableDNS=0
[TFTP-SETTINGS]
EnableTFTP=0
ROOT=C:\Users\Osx\Desktop\DHCP\wwwroot
WritePermission=0
[HTTP-SETTINGS]
EnableHTTP=0
ROOT=C:\Users\Osx\Desktop\DHCP\wwwroot
[00-01-A9-00-EE-E9]
IPADDR=192.168.68.1
AutoConfig=06/26/2016 12:41:32
Hostname=ICOM1120134
LeaseEnd=1467070189
Windows Ethernet config:
“Use the following IP Address”
IP 192.168.68.99
Subnet mask 255.255.255.0
Hope this help.
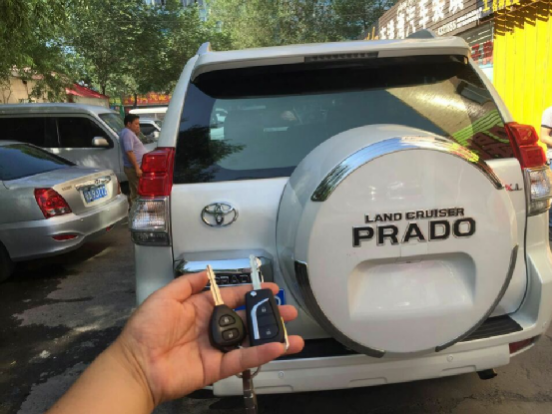
Have Toyota Land Cruiser Prado 2016 remote key, firstly use SKP1000 programmer to match 72 (with G) 433MHZ, then match the remote key manually
Chip model: 72 (with G)
remote control frequency: 433MHZ
Unlock direction: Clockwise
Key embryo: NO. 02
OBD position: under the steering wheel
Comes with another NO.1 & NO.2 ignition lock
Able to copy
No need Pin code
The remote control is able to generate
Chip maker: SKP1000 tablet key programmer
Remote control match tool: manually
Here we go!
Part 1: Chip 72 (with G) 433MHZ match with SKP1000 programmer
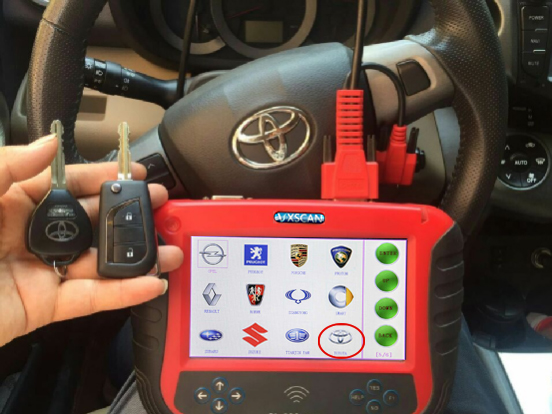
Tap ” Toyota” then “Immobilizer system 2”
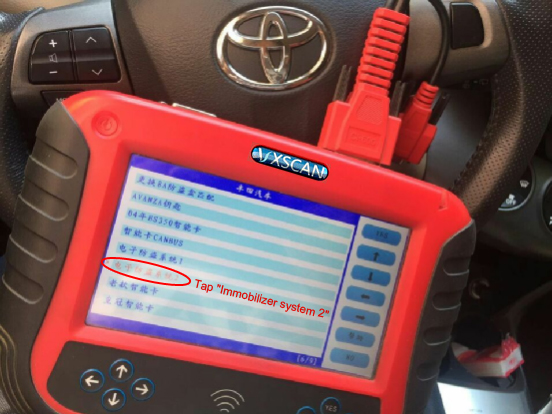
Please choose: OBDII socket, and turn on the ignition, press “Yes” to continue, and “NO” to back.

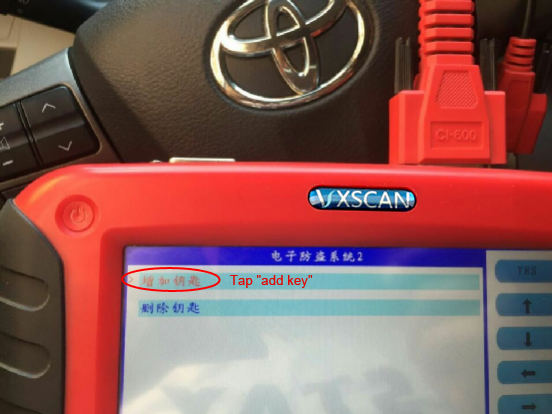
Tap “add key”
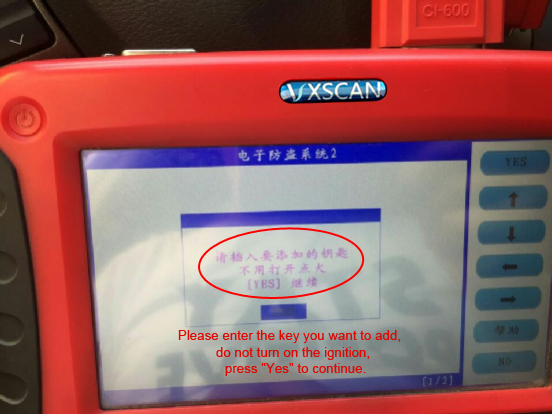
Please enter the key you want to add, do not turn on the ignition, press “Yes” to continue.
Wait until the immobilizer indicator light turn off, the chip 72(with G) match successfully, press “NO” to back.

Part 2: Remote key match manually
Procedure:
- Close all car doors, insert the key, open the main door, pull out the key.
- Insert the key into the ignition and pull out for two times.
- Close and open the side door for two times.
- Insert the key into the ignition and pull out for one time.
- Close and open the side door for two times.
- Insert the key into the ignitionswitch, close the door.
- the ignitionswitch ON-OFF for one time is the “add” mode, ON-OFF for two time is the “Reset” mode.
- Pull out the key from the ignition switch, at this time the door lock should move for 2 times, meanwhile hold the “LOCK” and “UNLOCK” buttons for one second then release, after 1 second repeat the same action. At this time, the central lock will automatically unlock and lock for one time. Move for one time means success and for two times means failure.
- Reset the other remote control, repeat the step 8.
If failure manually, recommend CI-pro to match the remote key.
http://www.fobdii.com/wholesale-488-skp1000-tablet-auto-key-programmer.html
XTUNER T1 diagnostic adapter Feedback on Caterpillar Trucks (with Pics)
XTUNER T1 is newly released heavy-duty trucks scanner,Complete function capability including DTC, DTC freeze Info, Live data, Actuation test and Special function.Windows XP/7/8/10 operating systems allows for more stable performances, better compatibility and expandability.

Finally I have time to write down what XTUNER T1 diagnostic adapter can work on Caterpillar Trucks after a long day outdoor in the 35ºC weather.
Seeing is believing, here 7 photos what I took today.


XTUNER T1 diagnostic adapter Feedback on Caterpillar:
ModelSystemECU InfoDTCDTCFreezeData
List320CPump ControlOKOK OK320CMonitorOK 320DEngine(C6_4)OKOK OK320DMachine ControlOKOK OK320DProduct LinkOKOK OK320DMonitorOK 320DEngine(C6_4)OKOK OK320DMachine ControlOKOK OK320DProduct LinkOKOK OK320DMonitorOK OthersPump ControlOKOK OKOthersEngine(C6_4)OKOK OKOthersMachine ControlOKOK OKOthersProduct LinkOKOK OK
I will update more pictures or videos here.
XHORSE VVDI Key Tool Remote Maker English language
Xhorse VVDI Key Tool remote maker supports most common remote types in the market; it is reliable and easy to use.

Software Version: V2.3.9
Hardware/Firmware Version: V2.0.2
How to use VVDI Key Tool:(Here take Generation of MG3 433 Remote Key for example)
1.Open VVDI Key Tool remote maker, select “Remote Generation”
2.Select vehicle country/ region,i.e China
3.Select Vehicle Make:MG
4.Select model: Old MG3 433
5. Connect VVDI key tool with vvdi mini remote programmer, click on generate
6.Select corresponding remote type, wireless or wire remote
7. After select generation remote, vvdi key tool will generate barcode automatically , take a photo of the barcode
8.Use decode device to decode the remote key with the barcode.
The new generated remote is almost the same as original remote with barcode
SKP1000 is Multifunction programmer with 4'inch touch screen, mainly designed for auto Key programming. covers all functions of SuperOBD SKP-900 key programmer. SKP-1000 is a convenient device which can perform immobilizer, EPB+ Oil srvice Reset , and special function, integrates more application and service, such as Maintenance Database, remote assistant, and One Key Update etc. support almost all cars in the world, such as BMW, Benz, Audi,Volkswagen,Ford, Land Rover, Chrysler, Jeep, Toyota, Nissan, Honda, Mitsubishi, Hyundai, Kia, and so on. MKP900 also can do Mileage Adjustment, Support Ford and Nissan pin code calculate, SKP1000 Key Programmer Features:Red color
Handheld with 4" display screen
Not too heavy to hold, very easy to take

Hyundai SONATA 8 smart remote controller
connect the main cable to the SKP 1000 machine
plug the OBDII adapter to the car
power on the SKP1000 Key Programmer machine, until you see the LOGO
press [YES] to the main menu
choose “Immobilizer”
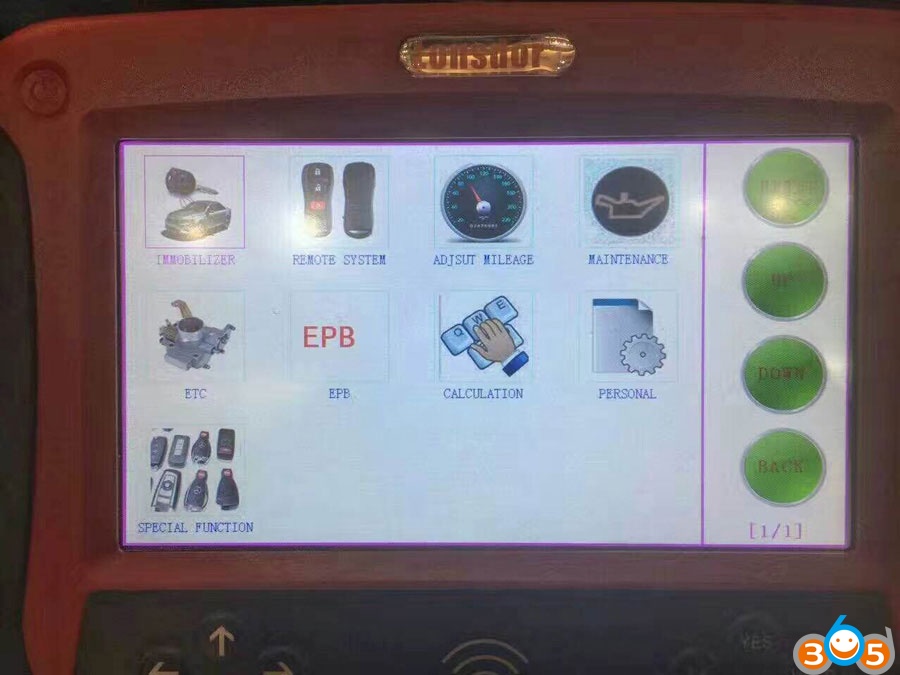
go to the SKP1000 car list
choose a model: Hyundai, press “Confirm”

choose “Smart card”, press “Yes”

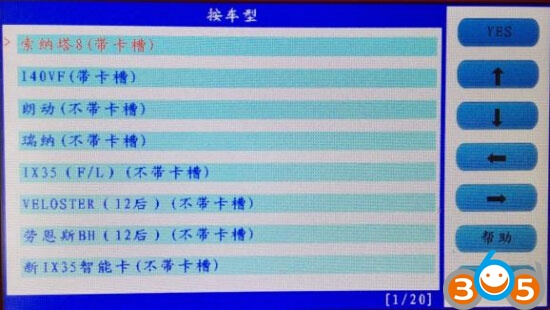
choose ” by car model”, press “Yes”

choose “SONATA 8 (with card slot), press “Yes”
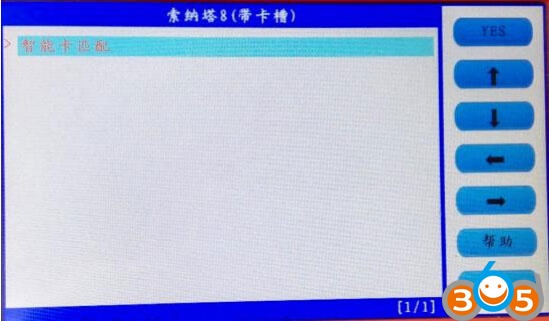
choose “Smart card (with card slot), press “Yes”

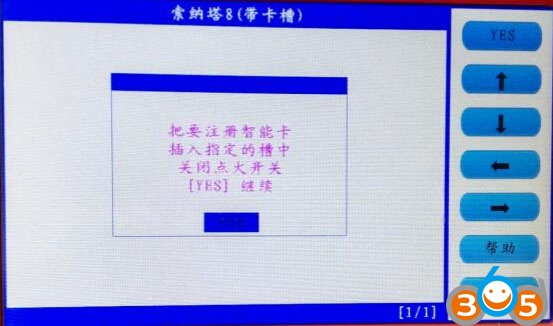
follow the prompt on the screen to turn off ignition, press “Yes”

open the door and close for one time, press “Yes”
choose smart card to match, press “Yes”
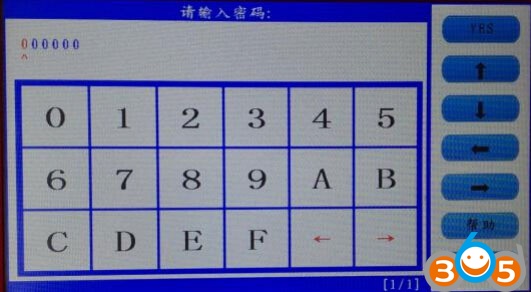
insert the smart card into the slot, and you can hear alarm sound, turn off the ignition, press “Yes”
input the password
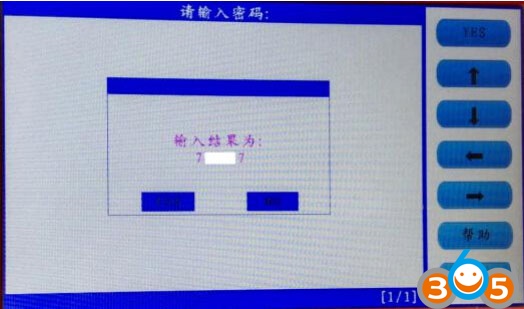
check if the password is correct, press “Yes” to confirm
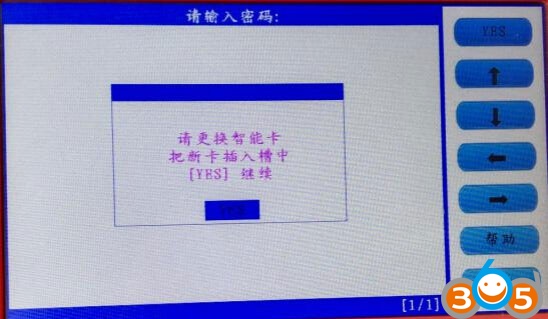
program the first smart card successfully
press “Yes” to program the next one
press “No” to complete key programming

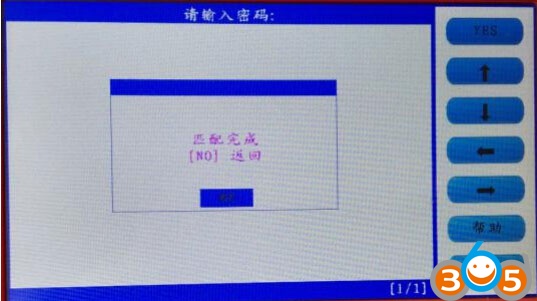
Done!
1. New MB SD Connect Compact 4 Star Diagnosis support wireless diagnose;
2. New MB SD Connect Compact 4 Star Diagnosis not only support K line diagnose and CAN BUS,but also UDS diagnose protocol. Because old MB STAR C4 main board do not have UDS chip, so old MB STAR C4 can not support it;
3. Multiplexer now use Lan cable to connect
4. Connector adopt Military quick swap technology, it can support 10,000 times pull plug, more stable;
5. All core accosseries adopt original new packing chip, and 24hours test, guarantee the quality of the products;
Notice: Our SD Connect 4 has installed WIFI card, it is better not to dismantle WIFI card by yourself.
Step one: Please prepare the following tools.

(1)— SDConnect multiplexer which need to input the batteries.
(2)— 6 units Ni-MH Rechargeable batteries, Size: AA, Voltage: 1.2V, Capacity: above 1700mA.
(3)—1 unit 108M WIFI Card.
(4)—Plum screwdriver, Specification: T20
Step two: Take out the rubber:
2.1 Use the T20 Plum screwdriver to take out the screw as below.

2.2 Take out the rubber as belwo.

(1)—Batteries Space.
(2)—WIFI Card Space
(3)—SD Card Space
Step three: Insert the Rechargeable batteries.
3.1 Use the T20 Plum screwdriver to take out the screw of Batteries Space fixation as below.

3.2 Take out the fixation of Batteries Space, pay attention to the Battery polarity marked in the Batteries Space.

3.3 Insert the batteries. Note the Battery polarity

3.4 Button on the Fixation of Batteries Space after inputting the Rechargeable battries.

3.5 Use the T20 Plum screwdriver to fix the screw of Batteries Space fixation as below. Inserting the batteries is finished.

Step four: Installing WIFI Card
4.1 Inserting the WIFI card into the WIFI Card Space. Please make the correct direction.

4.2 Push it to make it totally connected.

4.3 Cover the rubber and fix the screws to finish all the work.

a cheaper Lexia 3 Citroen Peugeot diagnostic tool for only 59usd and there are missing some chip, compared to the original one.

Original Lexia 3

Communicated with the vendor, they say the cheap Lexia 3 is designed with this kind of board as what i got.
On original interface “those caps” are resitors (473) 47k – R5 and R6. Optocouplers seems to be HCPL-063N-000E and HCPL-0500-000E. Also the filter from USB input is ACM2012D-900-2P (TDK) – most of clones have not this USB filter (2 resistors of 0 ohms are used).
On relay pcb the round red component is a varistor and original is V18ZA40P (in most clones is blue and have not the same specifications as the red one).
On relay pcb there is another optocoupler ZJYS51R5-2PT-01 (TDK) on the edge area near relays used for VAN BUS.
Some pictures from an original XS EVOLUTION PCB revision C.


He tells me, there mainly are two kinds of Chinese Lexia3 from different factories. One cheaper but lack some chips, the other with full chips of high quality.
The good Lexia 3 should come with PCBs as follows:


It’s item :
http://www.obdii365.com/wholesale/Lexia-3-Lexia3-Citroen-Peugeot-diagnostic-PP2000.html
And it’s very kind of the vendor that he tells me, even if the PCB is designed as above, there are some different similar clones, not all HQ.
This is the comparison he shows me:
The left: good ; the right: bad


Big thanks to fobdii.com, with lots of info to help me. Finally, i adapted his advice and decided to exchange the cheap Lexia 3 for a high-quality Lexia 3 with a bit more money. It works like a charm now.