
piros365's blog
XTUNER T1 diagnostic adapter Feedback on Caterpillar Trucks (with Pics)
XTUNER T1 is newly released heavy-duty trucks scanner,Complete function capability including DTC, DTC freeze Info, Live data, Actuation test and Special function.Windows XP/7/8/10 operating systems allows for more stable performances, better compatibility and expandability.

Finally I have time to write down what XTUNER T1 diagnostic adapter can work on Caterpillar Trucks after a long day outdoor in the 35ºC weather.
Seeing is believing, here 7 photos what I took today.


XTUNER T1 diagnostic adapter Feedback on Caterpillar:
ModelSystemECU InfoDTCDTCFreezeData
List320CPump ControlOKOK OK320CMonitorOK 320DEngine(C6_4)OKOK OK320DMachine ControlOKOK OK320DProduct LinkOKOK OK320DMonitorOK 320DEngine(C6_4)OKOK OK320DMachine ControlOKOK OK320DProduct LinkOKOK OK320DMonitorOK OthersPump ControlOKOK OKOthersEngine(C6_4)OKOK OKOthersMachine ControlOKOK OKOthersProduct LinkOKOK OK
I will update more pictures or videos here.
XHORSE VVDI Key Tool Remote Maker English language
Xhorse VVDI Key Tool remote maker supports most common remote types in the market; it is reliable and easy to use.

Software Version: V2.3.9
Hardware/Firmware Version: V2.0.2
How to use VVDI Key Tool:(Here take Generation of MG3 433 Remote Key for example)
1.Open VVDI Key Tool remote maker, select “Remote Generation”
2.Select vehicle country/ region,i.e China
3.Select Vehicle Make:MG
4.Select model: Old MG3 433
5. Connect VVDI key tool with vvdi mini remote programmer, click on generate
6.Select corresponding remote type, wireless or wire remote
7. After select generation remote, vvdi key tool will generate barcode automatically , take a photo of the barcode
8.Use decode device to decode the remote key with the barcode.
The new generated remote is almost the same as original remote with barcode
SKP1000 is Multifunction programmer with 4'inch touch screen, mainly designed for auto Key programming. covers all functions of SuperOBD SKP-900 key programmer. SKP-1000 is a convenient device which can perform immobilizer, EPB+ Oil srvice Reset , and special function, integrates more application and service, such as Maintenance Database, remote assistant, and One Key Update etc. support almost all cars in the world, such as BMW, Benz, Audi,Volkswagen,Ford, Land Rover, Chrysler, Jeep, Toyota, Nissan, Honda, Mitsubishi, Hyundai, Kia, and so on. MKP900 also can do Mileage Adjustment, Support Ford and Nissan pin code calculate, SKP1000 Key Programmer Features:Red color
Handheld with 4" display screen
Not too heavy to hold, very easy to take

Hyundai SONATA 8 smart remote controller
connect the main cable to the SKP 1000 machine
plug the OBDII adapter to the car
power on the SKP1000 Key Programmer machine, until you see the LOGO
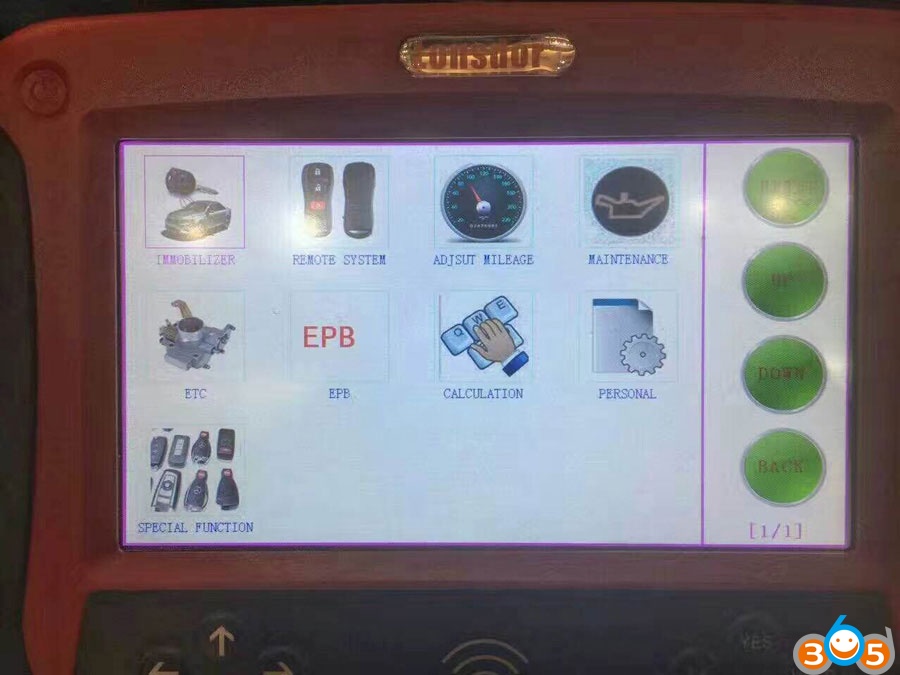
press [YES] to the main menu
choose “Immobilizer”
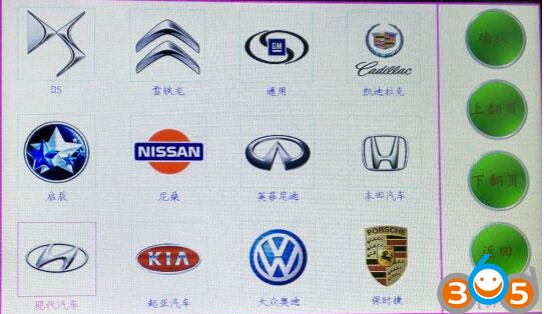
go to the SKP1000 car list
choose a model: Hyundai, press “Confirm”
choose “Smart card”, press “Yes”

choose ” by car model”, press “Yes”

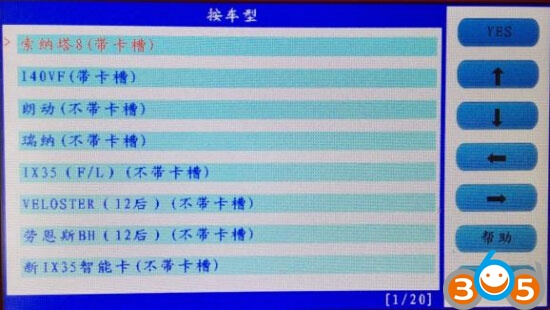
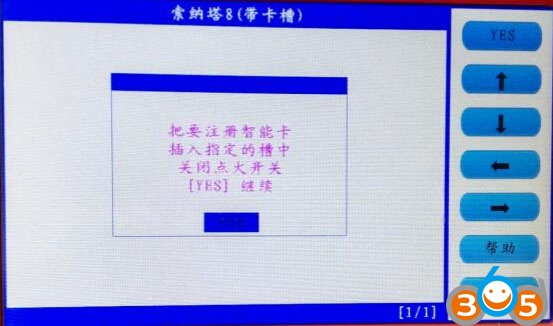
choose “SONATA 8 (with card slot), press “Yes”
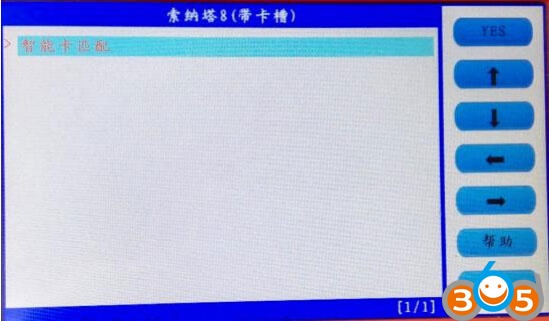
choose “Smart card (with card slot), press “Yes”

follow the prompt on the screen to turn off ignition, press “Yes”

open the door and close for one time, press “Yes”
choose smart card to match, press “Yes”
insert the smart card into the slot, and you can hear alarm sound, turn off the ignition, press “Yes”
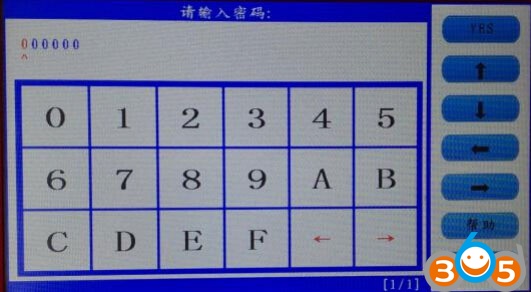
input the password
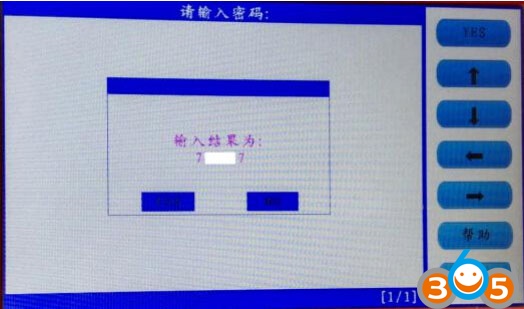
check if the password is correct, press “Yes” to confirm
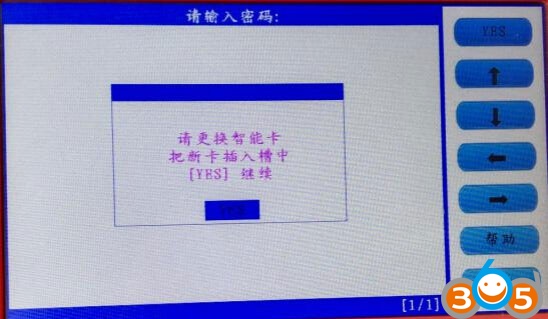
program the first smart card successfully
press “Yes” to program the next one
press “No” to complete key programming

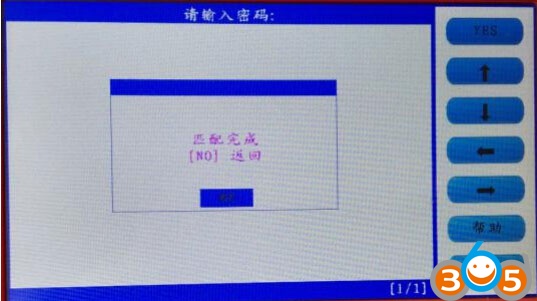
Done!
1. New MB SD Connect Compact 4 Star Diagnosis support wireless diagnose;
2. New MB SD Connect Compact 4 Star Diagnosis not only support K line diagnose and CAN BUS,but also UDS diagnose protocol. Because old MB STAR C4 main board do not have UDS chip, so old MB STAR C4 can not support it;
3. Multiplexer now use Lan cable to connect
4. Connector adopt Military quick swap technology, it can support 10,000 times pull plug, more stable;
5. All core accosseries adopt original new packing chip, and 24hours test, guarantee the quality of the products;

Notice: Our SD Connect 4 has installed WIFI card, it is better not to dismantle WIFI card by yourself.
Step one: Please prepare the following tools.

(1)— SDConnect multiplexer which need to input the batteries.
(2)— 6 units Ni-MH Rechargeable batteries, Size: AA, Voltage: 1.2V, Capacity: above 1700mA.
(3)—1 unit 108M WIFI Card.
(4)—Plum screwdriver, Specification: T20
Step two: Take out the rubber:
2.1 Use the T20 Plum screwdriver to take out the screw as below.

2.2 Take out the rubber as belwo.

(1)—Batteries Space.
(2)—WIFI Card Space
(3)—SD Card Space
Step three: Insert the Rechargeable batteries.
3.1 Use the T20 Plum screwdriver to take out the screw of Batteries Space fixation as below.

3.2 Take out the fixation of Batteries Space, pay attention to the Battery polarity marked in the Batteries Space.

3.3 Insert the batteries. Note the Battery polarity

3.4 Button on the Fixation of Batteries Space after inputting the Rechargeable battries.

3.5 Use the T20 Plum screwdriver to fix the screw of Batteries Space fixation as below. Inserting the batteries is finished.

Step four: Installing WIFI Card
4.1 Inserting the WIFI card into the WIFI Card Space. Please make the correct direction.

4.2 Push it to make it totally connected.

4.3 Cover the rubber and fix the screws to finish all the work.

a cheaper Lexia 3 Citroen Peugeot diagnostic tool for only 59usd and there are missing some chip, compared to the original one.

Original Lexia 3

Communicated with the vendor, they say the cheap Lexia 3 is designed with this kind of board as what i got.
On original interface “those caps” are resitors (473) 47k – R5 and R6. Optocouplers seems to be HCPL-063N-000E and HCPL-0500-000E. Also the filter from USB input is ACM2012D-900-2P (TDK) – most of clones have not this USB filter (2 resistors of 0 ohms are used).
On relay pcb the round red component is a varistor and original is V18ZA40P (in most clones is blue and have not the same specifications as the red one).
On relay pcb there is another optocoupler ZJYS51R5-2PT-01 (TDK) on the edge area near relays used for VAN BUS.
Some pictures from an original XS EVOLUTION PCB revision C.


He tells me, there mainly are two kinds of Chinese Lexia3 from different factories. One cheaper but lack some chips, the other with full chips of high quality.
The good Lexia 3 should come with PCBs as follows:


It’s item :
http://www.obdii365.com/wholesale/Lexia-3-Lexia3-Citroen-Peugeot-diagnostic-PP2000.html
And it’s very kind of the vendor that he tells me, even if the PCB is designed as above, there are some different similar clones, not all HQ.
This is the comparison he shows me:
The left: good ; the right: bad


Big thanks to fobdii.com, with lots of info to help me. Finally, i adapted his advice and decided to exchange the cheap Lexia 3 for a high-quality Lexia 3 with a bit more money. It works like a charm now.

Launch Creader 619 EASY TO USE: All-in-one screen and easy-to-use hotkeys make the 619 an ideal tool for the DIYer and professional technicians alike. Thoughtful design like Quick access with hot keys; Durable buttons with metal covers to prolong life; and Extended cover connections to maximize protection will allow this unit to last through years of constant use.
Launch Creader 619 FULL OBD FUNTIONS: CReader 619 provides full OBDII/EOBD diagnostic functions, Read dynamic data streams; Read readiness status; Turns off Malfunction Indicator Light (MIL); Query freeze frame data; Read current DTCs; Clear DTCs; O2 Sensor test; On-board monitor test; Read pending DTCs; On-board system or component control; Read vehicle information; Read permanent DTCs. Works on ALL 1996 and newer OBD II & CAN domestic or import vehicles.
Launch Creader 619 SPECIAL FUNCTIONS: CR6011 provides the ABS and SRS diagnostic functions, Read DTCs, clear DTCs, and read data streams for the ABS system and the SRS system. Works on 46 car models, see the description for more models.
OBD Scanner; OBD II Connector and cable; USB cable; One Bag; One Protective Case; Quick start guide in three languages (English, France and Spanish); Free update via the internet, Multilingual Support.
Launch Creader 619 Support Languages: English, Spanish, French, Russian, German, Portuguese, Japanese
1. OBD full features
1) Read dynamic data streams and MIL
2) Read readiness status
3) Query freeze frame data
4) Read current DTC
5) Clear DTC
6) O2 sensor test
7) On board monitor test
8) Read awaiting DTC
9) On board system or component control
10) Read vehicle information
11) Read permanent DTC
2. Color and graphical display of data streams
3. Query DTC
4. Free update of USB interface internet
5. Multilingual support
6. Data and replay
7. Read and clear DTC, view data streams for the ABS system
8. Read and clear DTC, view data streams for the SRS system
9. Print data via PC
10. With the same functions as AUTEL ALl619.
Introduction
The check engine light on a Toyota is an indicator that one of the sensors or systems operated or monitored by the computer is malfunctioning.OBDSTAR X300M The computer manages the engine functions and emission controls as well as several other systems. All present day vehicles have the same type of regulatory system employed to operate the function of the drive train.
History
Since 1973 when the auto manufactures first started to employ emission controls on vehicles, computers, still in their infancy, came on the scene. Their initial duties were to monitor the exhaust emissions and make corrections in the timing and the carburetor mixture to control the emissions. A good understanding of the primary function and control the computer has on the impact of the performance of the vehicle serves to lend predictability to the issue. Computers are common place and becoming more and more advanced with increasing responsibilities in the operation of the vehicle.
Functions
The Toyota computer not only operates as an engine management center, but it controls the emissions, the security system, the air conditioning, the suspension, the new Trac systems, the transmission functions and more. It does not however, have anything to do with the internal components of the Toyota engine. The Toyota check engine light does not tell the operator if the engine is low on oil or of a particular malfunction due to wear.
The Toyota has a computer called an Engine Control Management (ECM) computer that controls engine management.UCANDAS VDM2 There is a Automated Braking System (ABS) computer that operates the function of the brakes, a Body Ride Control that operates a multitude of accessory options such as power windows, locks, seats and so on. There is an air conditioning computer for the use of dual air conditioning, a transmission computer, and some that operate in conjunction with the main ECM computer to control the suspension.
Diagnosing
Purchase a computer OBS scanner from a parts store. The OBS scanner is a requirement for diagnosis. It is relatively inexpensive but a necessity. Computers store malfunctions in memory and illuminate the check engine light on the dash. The computer will relinquish these codes in the form of a series of numbers similar to a bar code. To retrieve and understand these codes, you need a scanner. The scanner will come with a code sheet to correspond with the codes presented.
Attach the code scanner to the OBS connector under the driver's side dash. Turn the ignition key on until the lights illuminate on the dash. Do not start the car. The scanner at this time will be displaying read codes. Push the button to read and the scanner will begin to interrogate the computer. It only takes a few seconds and the scanner will respond with a code or codes if more than one. Write these codes down, such as P1425 and look up the codes on the sheet provided for a definition.
Just because the computer generated a code for the oxygen sensor (oxygen sensor malfunction), does not necessarily mean that it is bad and should be replaced. The oxygen sensor measures the amount of oxygen in the exhaust system by producing a very small voltage that the computer sees as an indication as to the fuel mixture being to rich or lean. A multitude of things can cause the oxygen sensor to indicate the wrong mixture.XTOOL HD900 For example a bad spark plug, wire, air leak in the manifold, bad thermostat or bad gas. If the car is running well enough and you see that this code came up, know that no disaster is imminent and continue to drive until it can be repaired or you can check it out yourself. To properly diagnose a code, even with a computer, it helps to read the manual so that you know what each sensor does and what else on the vehicle may cause that sensor to generate a code.