
roulinn520's blog
fobdii.com is currently rolling out latest Mercedes-Benz MB Star diagnostic DAS Xentry software 2017.07V for MB SD Connect C4 and MB Star C3 diagnostic system.

Software version: 2017.07V
You can log in Daimler AG program without user name and password needed, it is used to check price for Benz vehicle accessories.Software Language: Chinese, English, Croatian ; Czech; Danish; Dutch; Finish;French; German; Greek; Hungarian;Italian; Japanese; Korean; Polish; Portuguese; Romanian;Russian; Spanish; Swedish; & Turkish.
WIN7 HDD do not support HHT-WIN! Software version newer than V2017.12 do not support HHT-WIN!
2017.7V MB Star diagnosis software including:
1.D-A-S / Xentry 2017.7 : the automatically Diagnosis Assistance System ,Concise interface and straightforward operation with IB M high-quality computer can realize the quick and accurate code reading and the whole car system testing
2.W-I-S net 2017.06: Workshop Information System Supply the whole view of the wiring diagram in a car,component location diagram and maintenance method. What you do is to enter the chassis number, and then you will get the manufacture data, engine configuration and the car model -all in detail.
3.EPC.net 2017.06: Electronic Parts Catalog
4.ST Finder 2017 art location finder
5. STARUTILITIES: the movement management system and self-test
6. SDMEDIA 2014
7. PL70
MB SD Connect Compact C4 2017.7V Software Display:


Star Finder 2017

EPC 2017.06

V2017.7 MB SD C4 Software Functions:
1.1989~up to now Car, Bus, Truck, Sprint, Smart ;
2.All electric system Diagnostic Do not include flash code)
3.reading trouble code
4.erasing trouble code
5.live-data
6.adaptation
7.component testing
8.maintenance
9.information consultation
10.component location diagram
11.wiring diagram
Testable system:
ENGINE
AUTO-SPEED
AIRCONDITIONAL SYSTEM
SRS
ABS
ASR
MPL
GM
Bz ORIGINAL ANTI-THEFT
DASX SYSTEM
KEYZESS GO SYSTEM
OBD-II SYSTEM
MB SD C4 can only be used by wire connection for the WLAN cannot work normally and there is no WLAN option on MB SD C4 device .
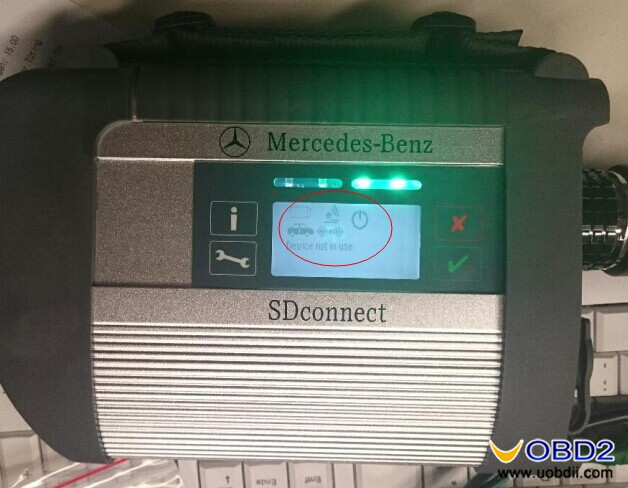
Device:
Possible cause:
This is not China SD C4 software;
Some files are lost when update yourself;
Other causes make SD C4 mux cannot work normally.
Solution:
Just Update your sd connect c4 firmware to the newest version 2.30:
Step 1
Please prepare 6 AA5 batteries according to Step-by-Step
Note: Please do use brand new batteries with sufficient electricity; otherwise, you will fail to update the firmware.
Step 2
Select the green cable to connect to your laptop and MB SD Connect Compact 4 diagnostic multiplexer, and use OBD cable to connect to MB SD C4 multiplexer and your vehicle. (If the vehicle cannot be connected, select OBD 12V power instead.)
Step 3
Open the software “2012.09 DAS”.
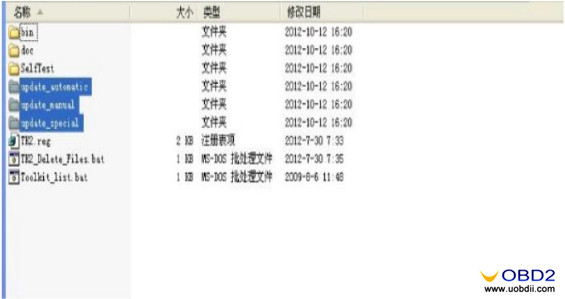
Go to C:\ program files \ SDconnect Toolkit to check whether there are the three following files as the pic below shows.
Update_automatic;
Update_manual;
Update_Special.
If the files’ names are different from the pic shows, please correct the names the same as the pic shows.
Step 4
Restart your computer.
Update firmware to the latest version
[update instruction file]
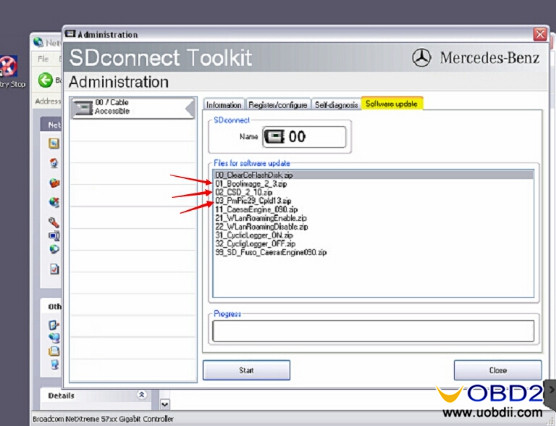
For update, the three files above need to be upgraded.
(01_Boolimage_2_3.zip
02_CSD_2_10.zip
PmPic29_Cpld13.zip)
The update order:
02_CSD_2_10.zip> 01_Boolimage_2_3.zip> PmPic29_Cpld13.zip
NOTE: When update, please do use brand new batteries. Also, you need OBD cable to connect to your vehicle for power supply. (If you cannot succeed in connecting to the vehicle, choose OBD 12V power instead; otherwise, 622 error report would appear to tell you that the upgrade is unsuccessful.)

In general, this 00 error means that it is set poorly.
Result:
WLAN option shows on MB SD C4 multiplexer. SD C4 can be connected via wire or WIFI.
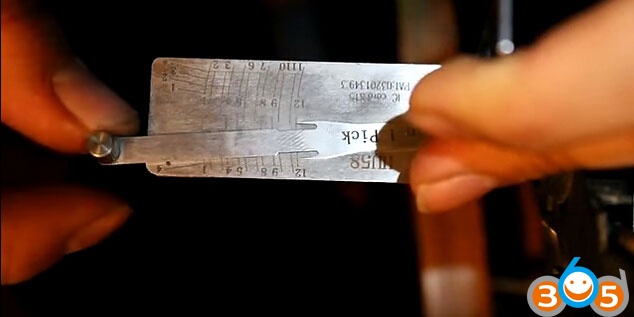
Lishi tools 2 in 1 user guide for those keen to learn about the genuine Lishi BMW HU58 2 in 1 picking & over-lifting technique.
With Lishi HU58 2 in 1 lock pick and decoder when you pick the lock , the lock will turn slightly then you can decode the lock, but if you want to just open lock without decoding then pull out 2in1 a little and the lock will turn, if you don’t pull the tool slightly out then lock will not turn, they could not put the cut out on the tool as it is on the key as this would weaken the tool
An overlifter is a key blank cut with a No1 cut in each position yes then you must cut down the shoulders to allow room for complete key and tension wrench in the lock.
when you have made your overlifter key
1) insert tension wrench
2) insert your overlifter key fully so all wafers are lifted
3) apply tension to the tension wrench
4) remove the overlifter key maintaining the turning tension
5) this will hold all wafers in the No 1 height position
6) gently feather your tension removing a tiny bit of tension at a time.
7) you will hear little clicks as wafers fall in turn
8) once tension is fully removed if lock isnt open then start again
The knack is the feathering of the tension , let too much tension off in 1 go and too many wafers will drop , let too little off it takes longer , its just practice to get this rght.
Remember when picking the HU58 , the plug will turn 10 degrees once picked and stop , you then need to withdraw pick about 1/2 cm to a little arrow by the Lishi logo, once in line with arrow the plug will fully rotate and open.
There are 3 versions of this lock i’ve seen to date , some have wafers missing in some positions , some have all wafers and some have blocked No 9 position .
As has been said overlifting is a much quicker opening on these using a key cut to a No 1 height and the shoulders cut back , a good tension wrench and a little practice on correct feather tension yeilds instant results , same with mercedes HU64 overlift a dream.
Remember with BMW Auto Locksmith Tool boots these pick anti clockwise to open , if you pick clockwise which is easier , hold the plug half way between verticle and horizontal then spin anti clockwise , as if you fully turn from vertical to horizontal you will apply the deadlock.
if the BMW plug on boot is vertical its not deadlocked and will open on central locking or will need picking anti clockwise once , if the plug is horizontal then its deadlocked and needs picking twice or spinning when half way between horizontal and vertical.
Here, attach some photos of how to use LISHI Lock Pick (HU58) for old BMW
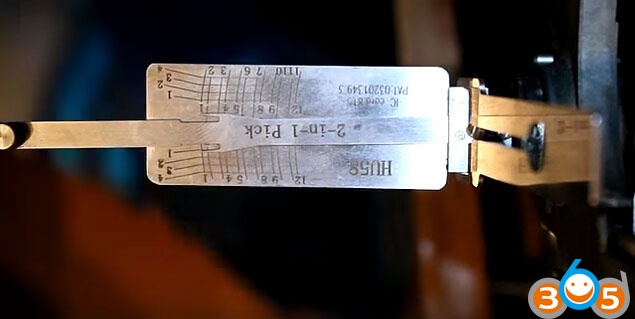

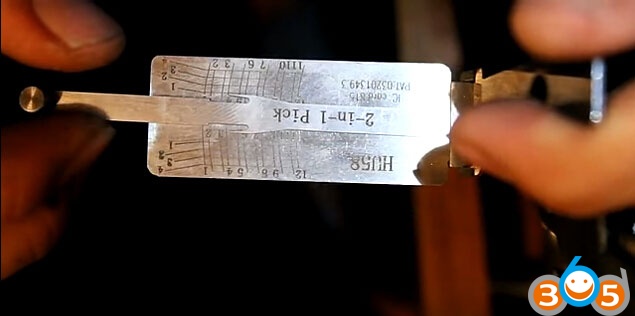
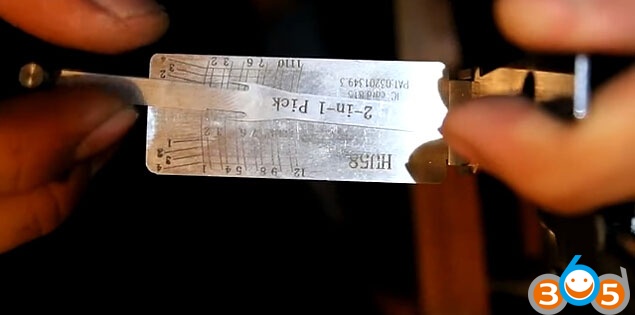
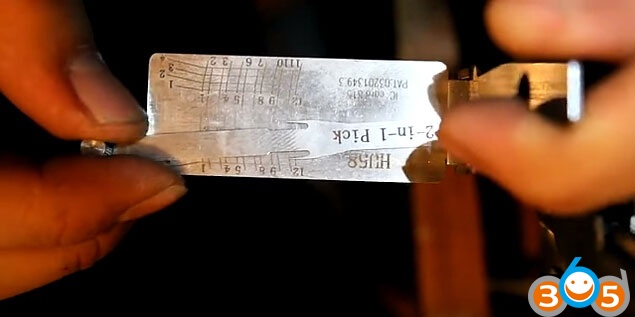
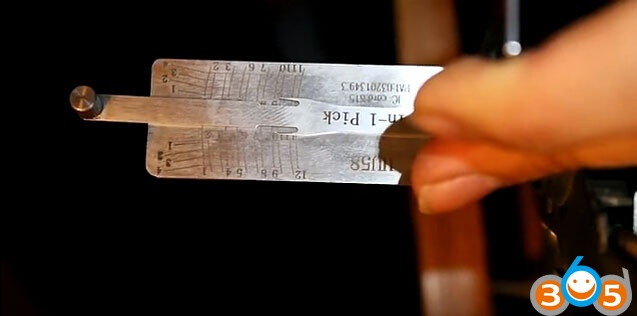
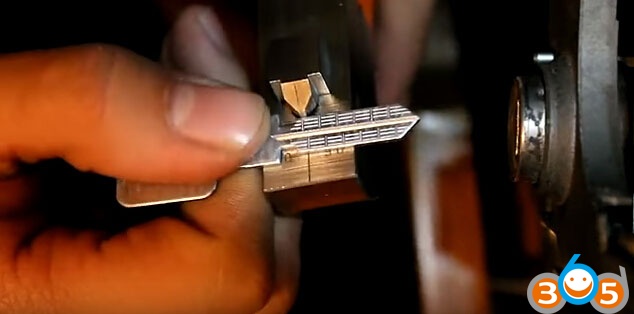
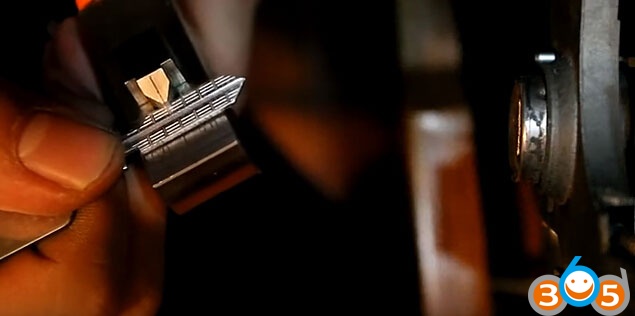
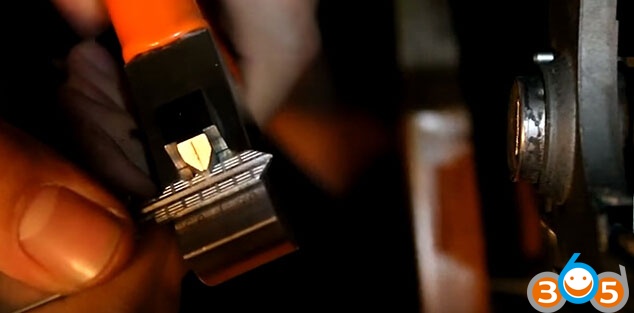
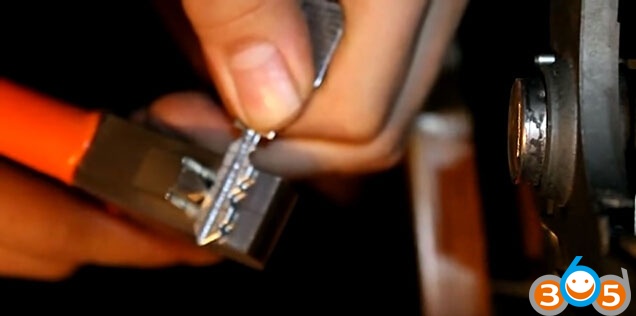
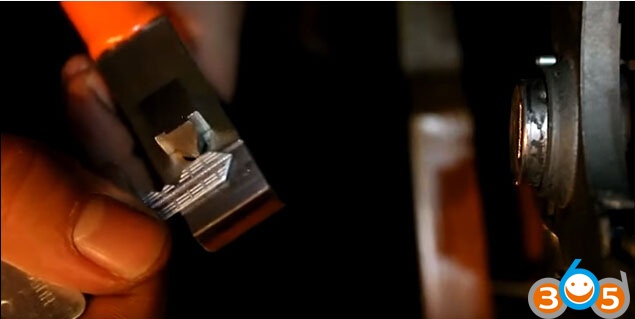
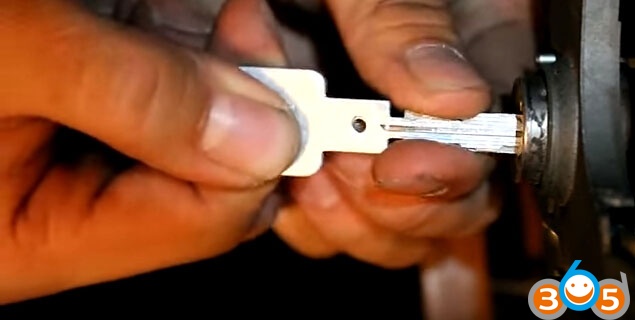


Works perfect! All done with LISHI HU58 2-in-1 and LISHI HU58 Blade for BMW
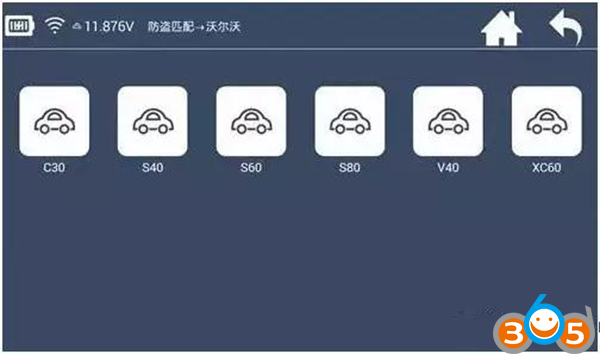
Lonsdor K518ISE Auto Key Programmer program Volvo XC60 smart key via OBD: success
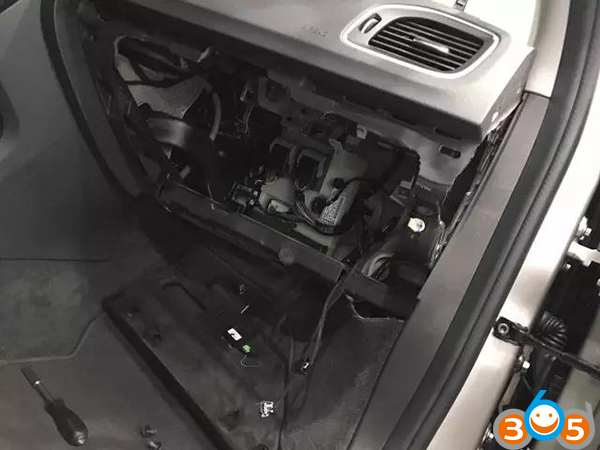
Step 1: Read the security data of the CEM module
Volvo’s CEM are located under the co-pilot airbag on the left, remove the debris box
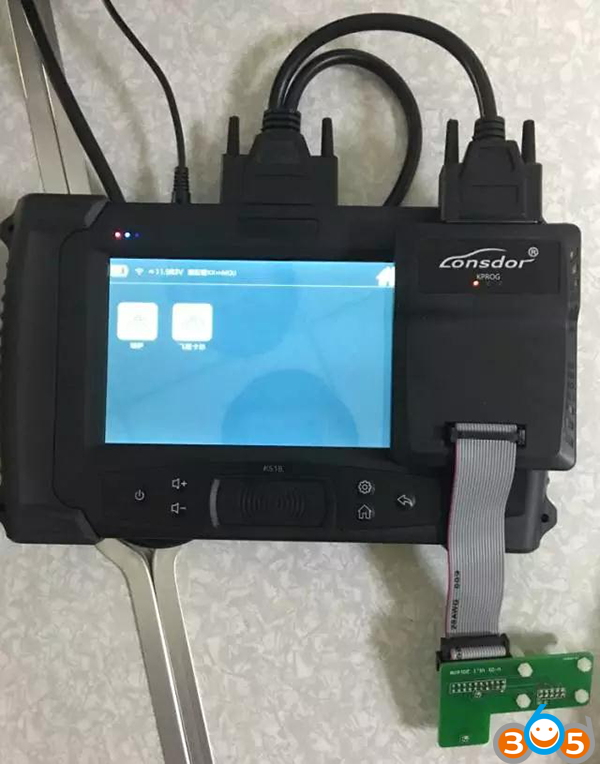
Read CEM data with RN-01 board:
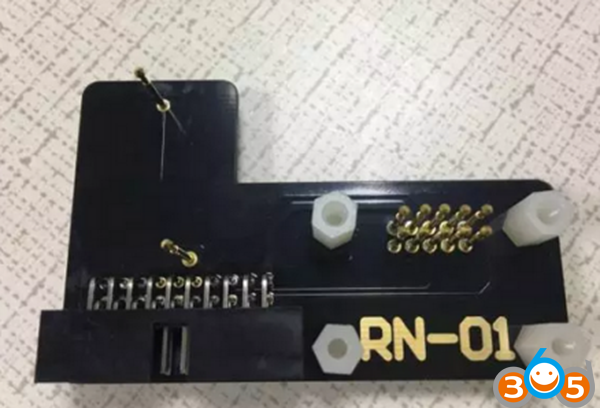
Plug K518ISE host, adapter, and RN-01 board:
Note: the new/old CEM box looks the same, but with different circuits.
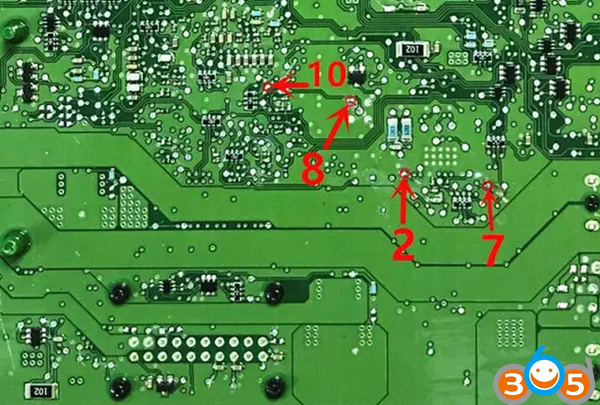
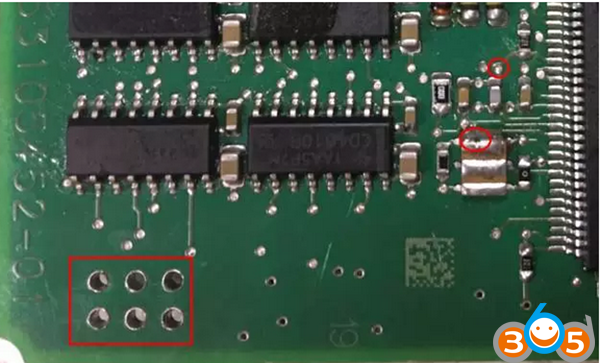
For the old version of the CEM box:
when opening the lid, in the back of the circuit board, please pay attention to the black column with blue circles, which are the four positioning points that need to match stably with the white column of RN-01 board.
Note: The circuit board is coated with insulating glue, it is required to use the washing plate water to wash off the blue area of the insulation coating in the contact point (solder joint) , or power can not go through , if the needle of RN-01 board is broken, it will do to wire in the corresponding locations.


For the new version of the CEM box:
the circuit is different, which requires to wire to read the anti-theft data
the wiring diagram
Connect power to read the data
Separate RN-01 board to the motherboard to prevent it from conduction
Welding cable shouldn’t be more than 15cm
Step 2: Read the security data of the KVM module
Volvo’s KVM modules are located after the rear box, in the upside of the right rear wheel position (for 16 S60L car, dismantle from the right rear door to the wheel direction);
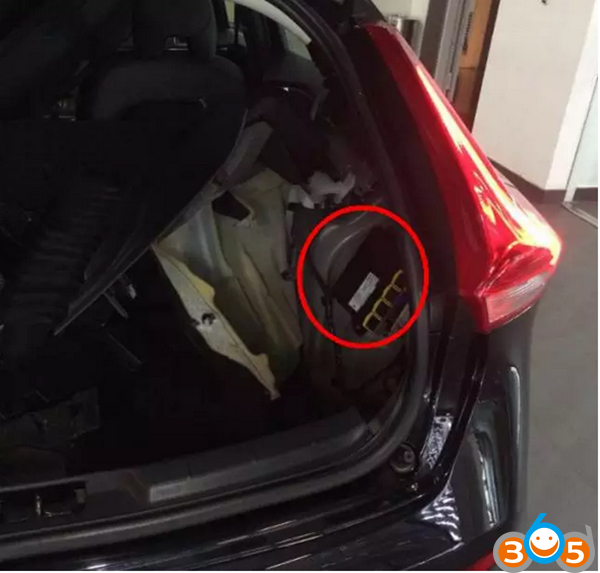
Open the module cover
Use the washing plate water to wash off the blue area of the insulation coating, or power can not go through.
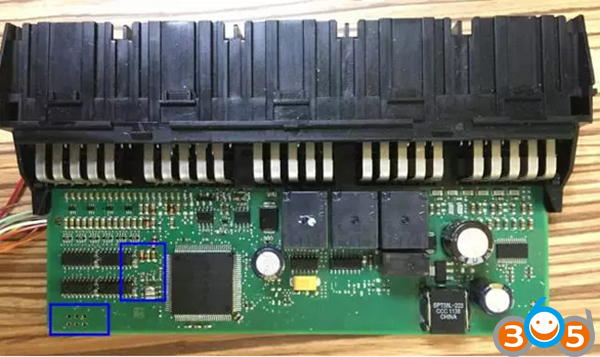
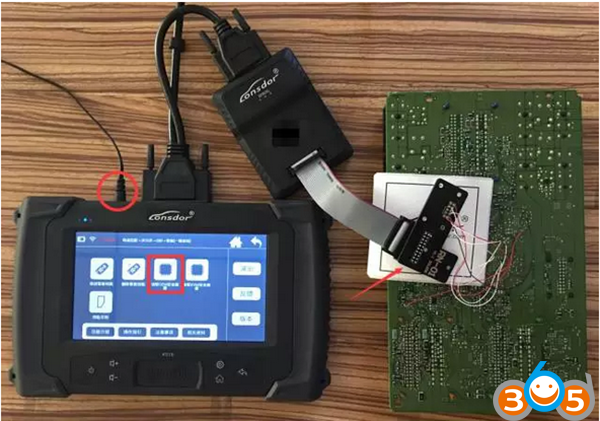
Read KVM data with FS-01 board:
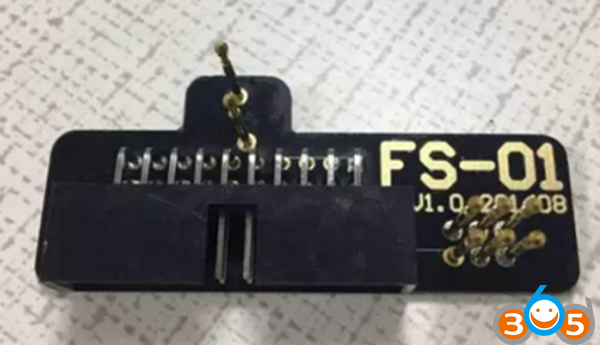
The positions in red circle are the 8-pin insertion points of FS-01 board:
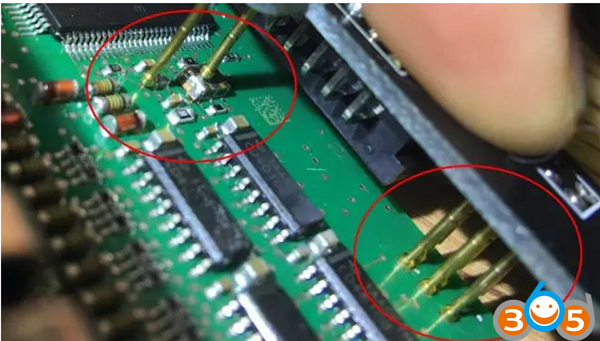
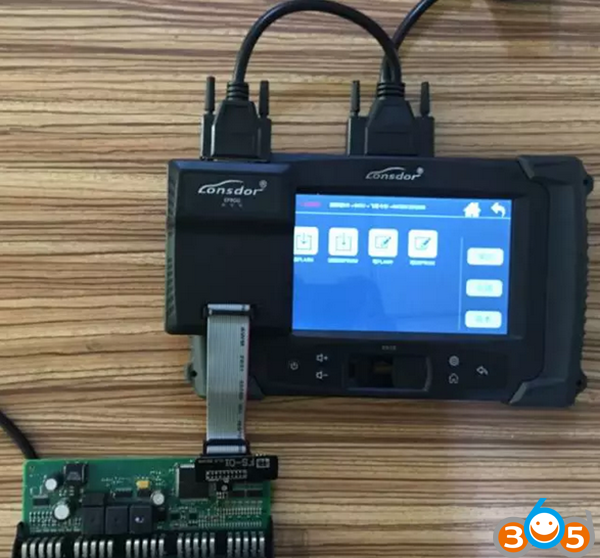
The connection of the Lonsdor K518ISE machine, adapter and FS-01 board:
The most important note:
To failures in Volvo KVM data reading (coz the chip model is different), please do as follows:
① Use programmer to read out the data (.bin file);
② Contact and send the EEPROM data to K518ISE after-sales service, the engineers will convert the data into a dedicated file;
③ Connect K518ISE with computer and put the dedicated file into “file —> feature_35” folder;
④ Following the operations to select the KVM data from the process.
Step 3: Program smart keys via OBD
Refer to the following notes:
- For 6 keys, duringoperation, you need to firstly insert the keyinto the key slot and then operate by following the directions.
- For key recognition failure, please make sure the smart keyis not locked, aslocked key cannot be programmed, the fresh new key generally will not be locked.
- K518ISE has identification& unlock functions, which will test and identify whether a key is an unused one or not. If the remote control is invalid after the key is programmed (on condition that the battery is well installed and the remote control frequency is correct), try to import the CEM security data to unlock the key and then program again.
Note: Only the key of this car or corresponding car can be unlock after reading the CEM security data.
4,When installing Volvo battery, please note that the two batteries are placed in an overlap way and separated by a white paper in the middle, so please do not just replace the above one.
Dismantling is very simple also , just remove the metal key, and gently pry with a not so sharp knife in the same place where the metal key lies.
Done!