
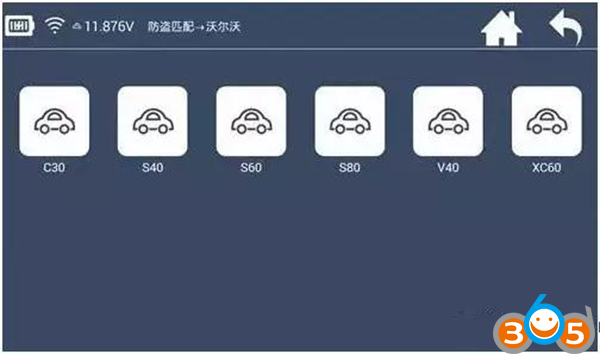
How To used Lonsdor K518ISE program Volvo XC60 smart key
Lonsdor K518ISE Auto Key Programmer program Volvo XC60 smart key via OBD: success
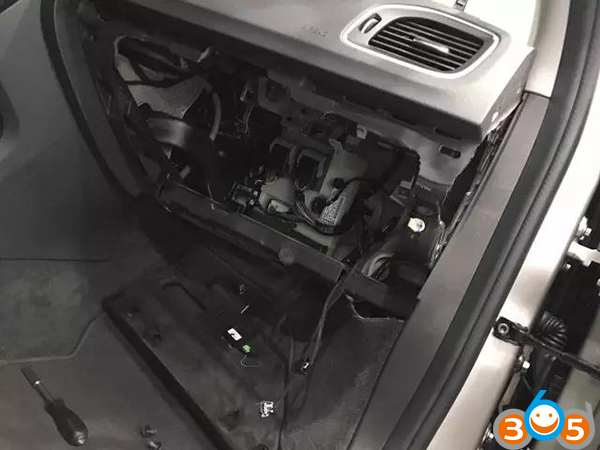
Step 1: Read the security data of the CEM module
Volvo’s CEM are located under the co-pilot airbag on the left, remove the debris box
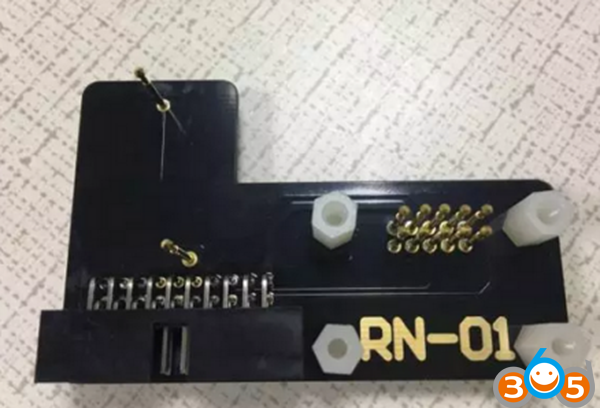
Read CEM data with RN-01 board:
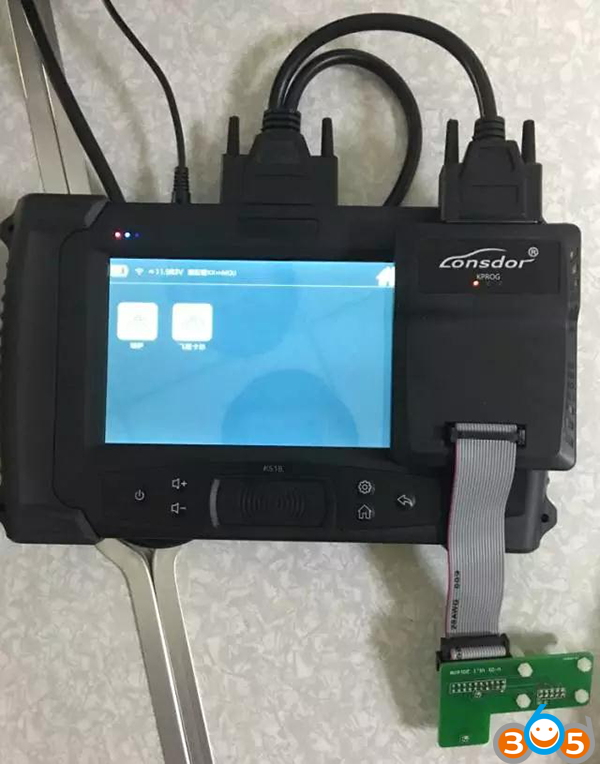
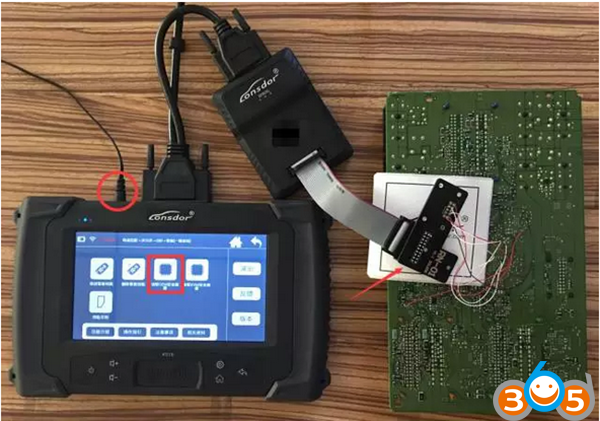
Plug K518ISE host, adapter, and RN-01 board:
Note: the new/old CEM box looks the same, but with different circuits.
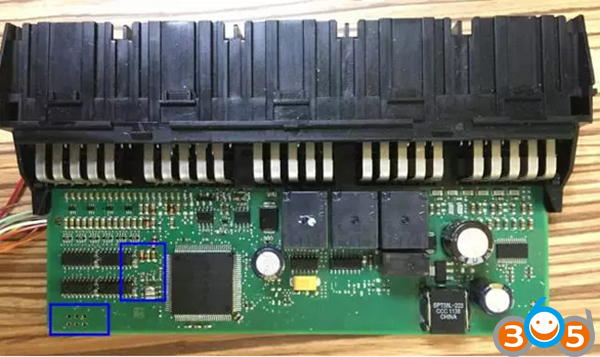
For the old version of the CEM box:
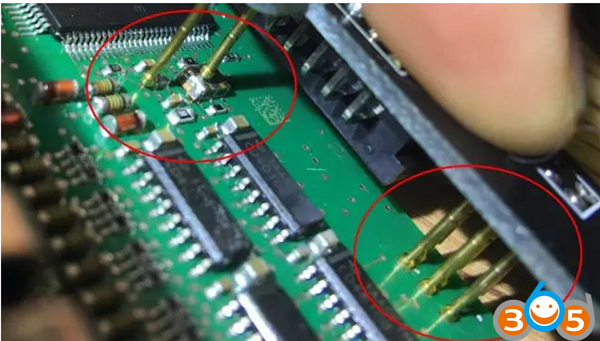
when opening the lid, in the back of the circuit board, please pay attention to the black column with blue circles, which are the four positioning points that need to match stably with the white column of RN-01 board.
Note: The circuit board is coated with insulating glue, it is required to use the washing plate water to wash off the blue area of the insulation coating in the contact point (solder joint) , or power can not go through , if the needle of RN-01 board is broken, it will do to wire in the corresponding locations.


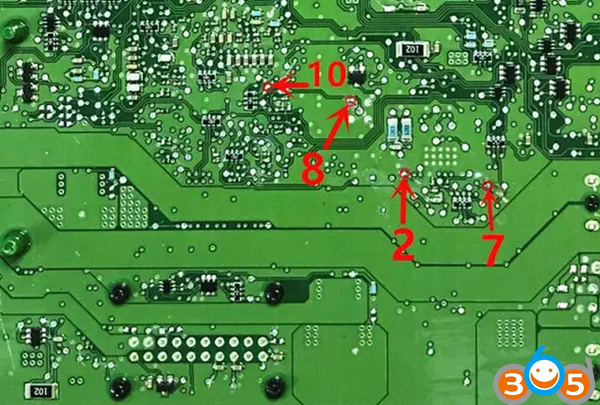
For the new version of the CEM box:
the circuit is different, which requires to wire to read the anti-theft data
the wiring diagram
Connect power to read the data
Separate RN-01 board to the motherboard to prevent it from conduction
Welding cable shouldn’t be more than 15cm
Step 2: Read the security data of the KVM module
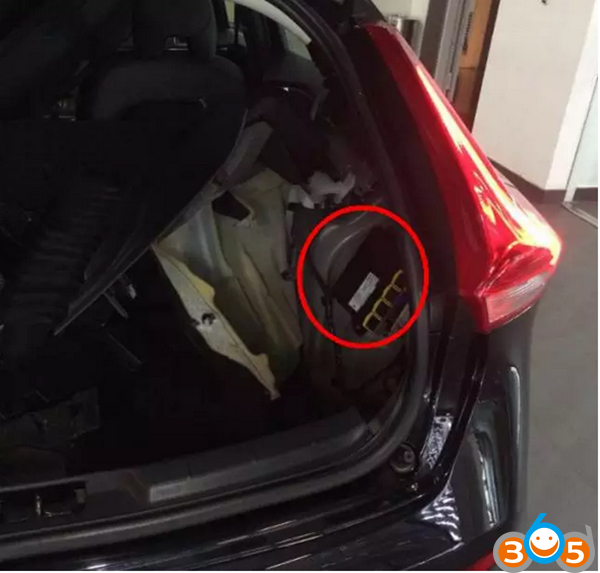
Volvo’s KVM modules are located after the rear box, in the upside of the right rear wheel position (for 16 S60L car, dismantle from the right rear door to the wheel direction);
Open the module cover
Use the washing plate water to wash off the blue area of the insulation coating, or power can not go through.
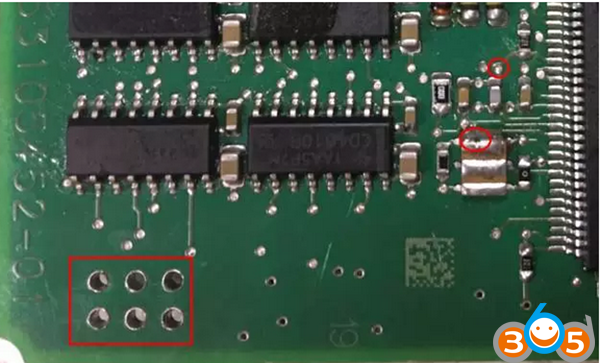
Read KVM data with FS-01 board:
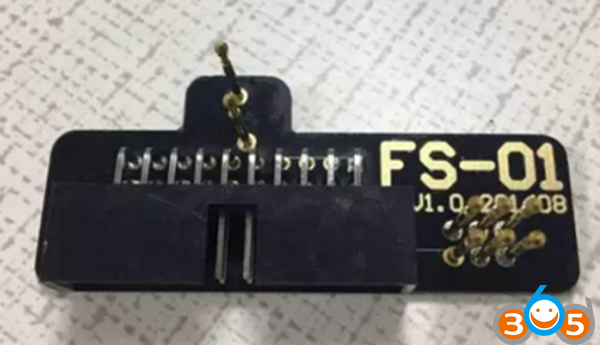
The positions in red circle are the 8-pin insertion points of FS-01 board:
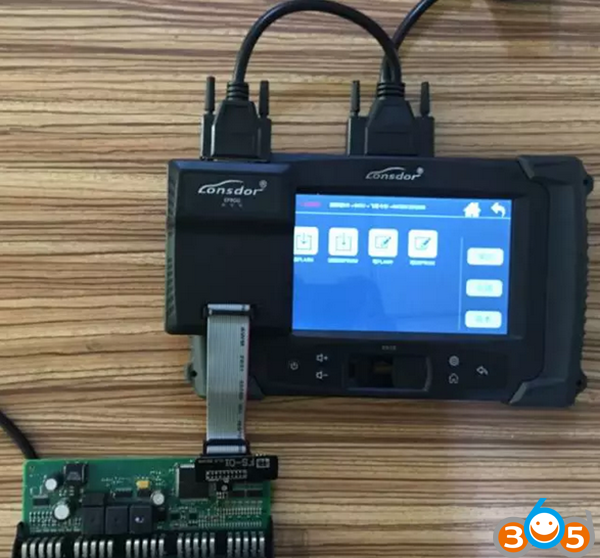
The connection of the Lonsdor K518ISE machine, adapter and FS-01 board:
The most important note:
To failures in Volvo KVM data reading (coz the chip model is different), please do as follows:
① Use programmer to read out the data (.bin file);
② Contact and send the EEPROM data to K518ISE after-sales service, the engineers will convert the data into a dedicated file;
③ Connect K518ISE with computer and put the dedicated file into “file —> feature_35” folder;
④ Following the operations to select the KVM data from the process.
Step 3: Program smart keys via OBD
Refer to the following notes:
- For 6 keys, duringoperation, you need to firstly insert the keyinto the key slot and then operate by following the directions.
- For key recognition failure, please make sure the smart keyis not locked, aslocked key cannot be programmed, the fresh new key generally will not be locked.
- K518ISE has identification& unlock functions, which will test and identify whether a key is an unused one or not. If the remote control is invalid after the key is programmed (on condition that the battery is well installed and the remote control frequency is correct), try to import the CEM security data to unlock the key and then program again.
Note: Only the key of this car or corresponding car can be unlock after reading the CEM security data.
4,When installing Volvo battery, please note that the two batteries are placed in an overlap way and separated by a white paper in the middle, so please do not just replace the above one.
Dismantling is very simple also , just remove the metal key, and gently pry with a not so sharp knife in the same place where the metal key lies.
Done!
Post
| By | roulinn520 |
| Added | Oct 13 '2017, 1:32 |
Tags
Rate
Archives
Categories
Most Viewed
-
 Find Out the Best Media Streamer That...
Jul 30 '2016, 7:55
Find Out the Best Media Streamer That...
Jul 30 '2016, 7:55
-
5 Closely-Guarded fifa 17 demo review...
Nov 11 '2016, 1:30
-
 Premium sex dolls are better
Mar 18 '2023, 2:15
Premium sex dolls are better
Mar 18 '2023, 2:15
-
Save Big on CS:GO Prime Accounts and...
May 20 '2023, 3:40
-
 How to Protect your Village in Coin...
Jan 16 '2018, 14:35
How to Protect your Village in Coin...
Jan 16 '2018, 14:35
Most Discussed
-
 Experience unparalleled companionship...
Nov 17, 2:39
Experience unparalleled companionship...
Nov 17, 2:39
-
 Increase the significance of your...
Nov 4 '2022, 0:35
Increase the significance of your...
Nov 4 '2022, 0:35
-
 5 Tips To Guarantee The High ROI Of...
Aug 26 '2021, 4:00
5 Tips To Guarantee The High ROI Of...
Aug 26 '2021, 4:00
-
Packers and Movers Pune @...
Feb 8 '2017, 1:15
-
5 Modern ways of Facebook hacking and...
Nov 23 '2016, 6:24